Recipe: Appe with green chickpeas

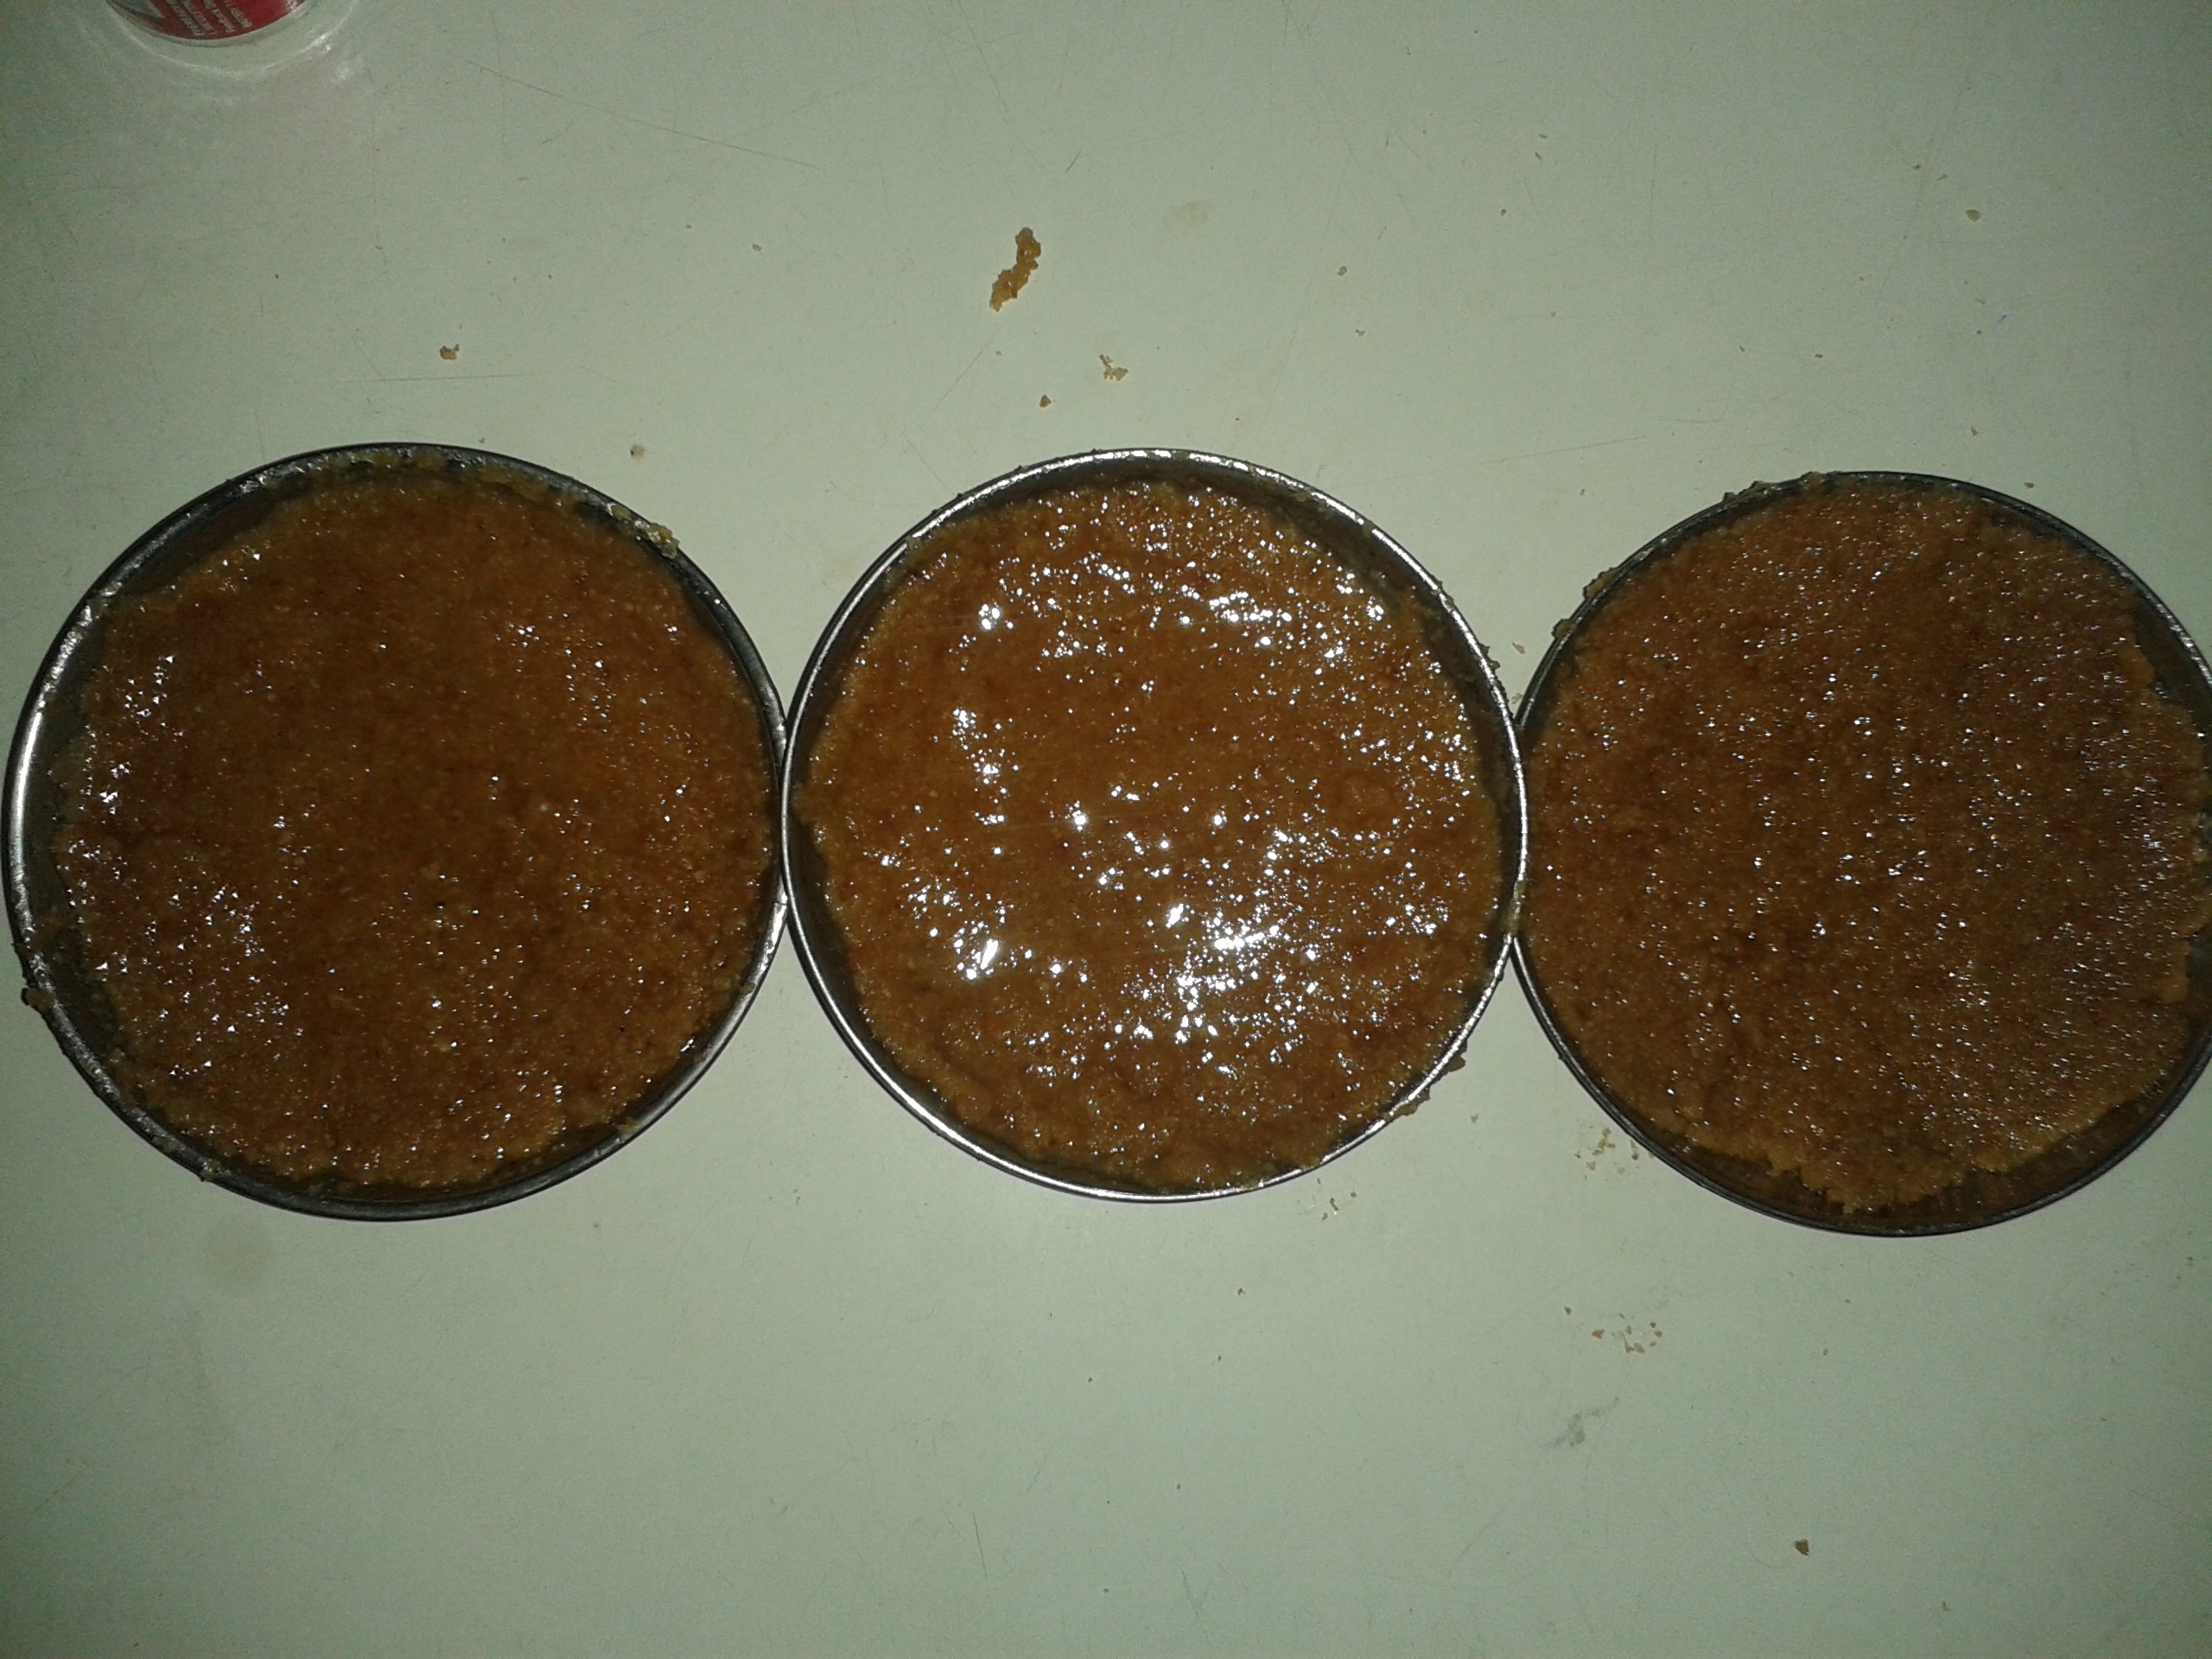
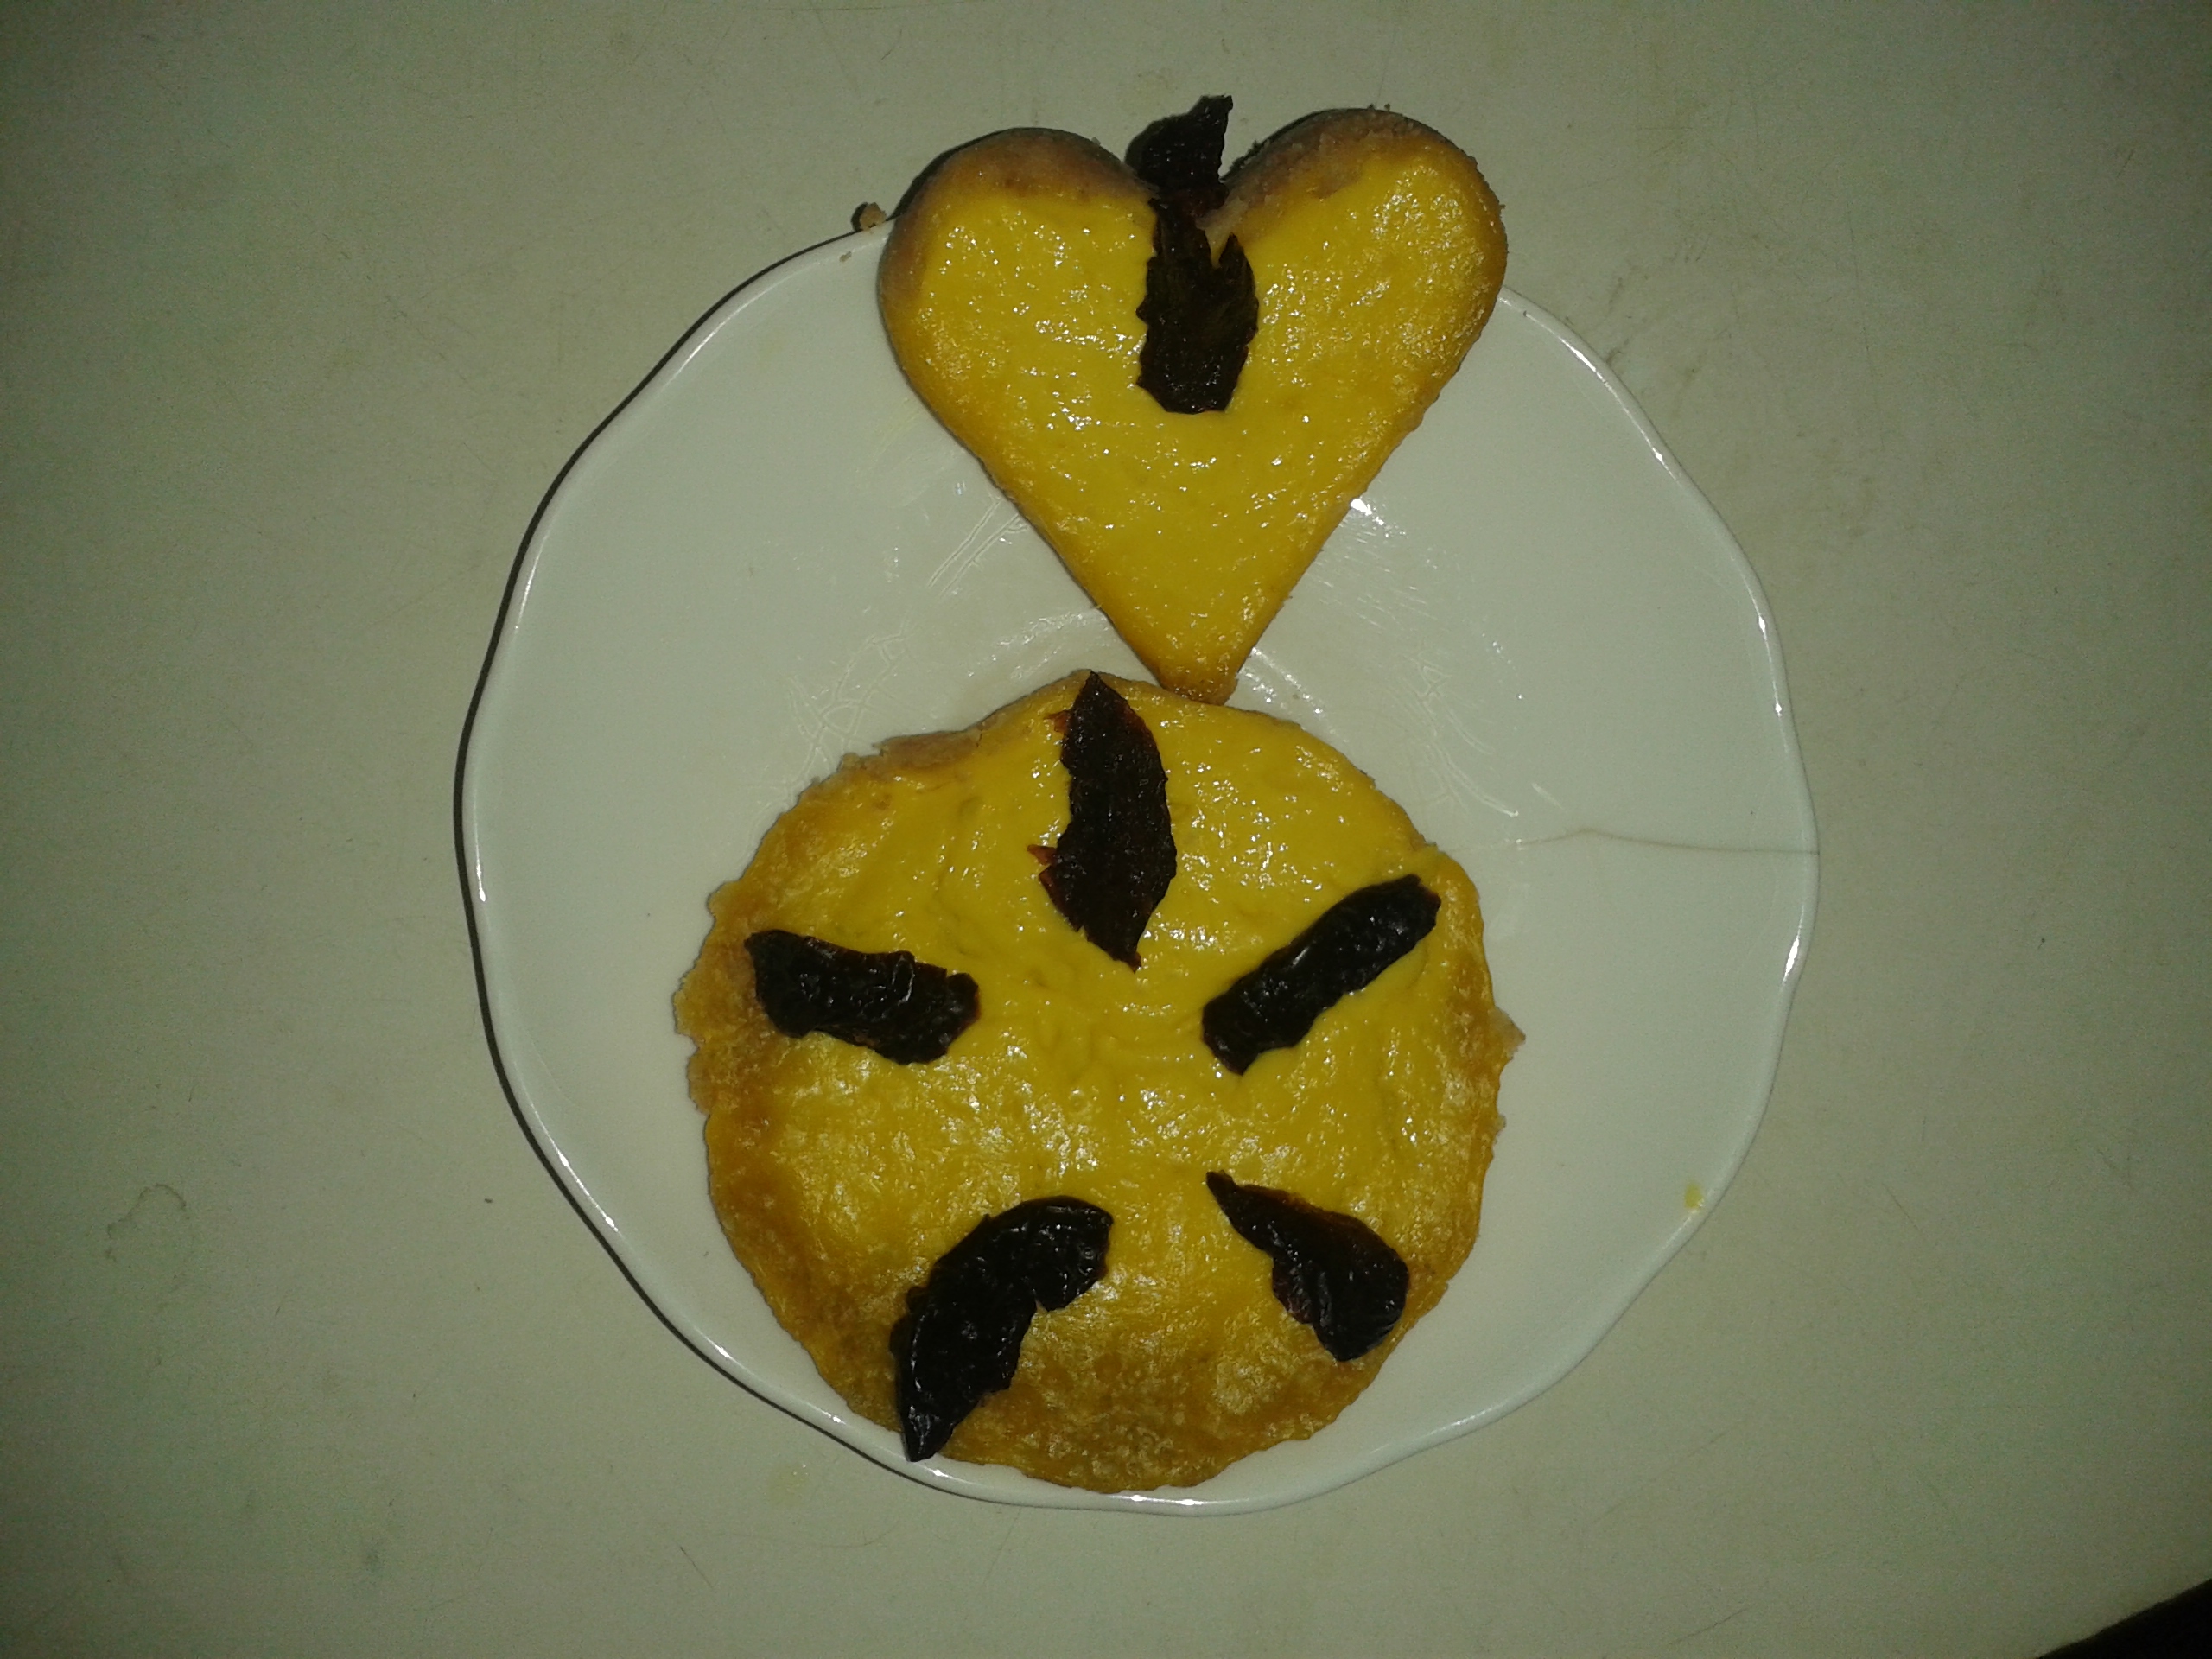
Appe is South Indian dish that is popular in the Konkan region of India. Traditionally, Appe is made from rice flour and Urad dal. Since green chickpeas (hare chane) are in season, I’ve added a twist to the recipe to make it with the chickpeas and semolina (Suji). You will need a special cooking utensil called ‘Appam patra’ for this. It is a pan with mini bowls built into it. You can see how it looks in the pics that follow.

Ingredients:
• Green Chickpeas / Hare Chane – 2 cups, soaked over night
• Semolina / Suji – 2 cups
• Onion – 1
• Peanuts – 2 table spoon, crushed.
• Green Chillies -2
• Coriander – 1 table spoon (Optional)
• Red Chilly powder – 2 teaspoons
• Asfoetida / Hing – 1 pinch
• Tomato Puree – 2 table spoons
• Salt – To taste
• Water – 1 cup
• Oil – to fry

Process:
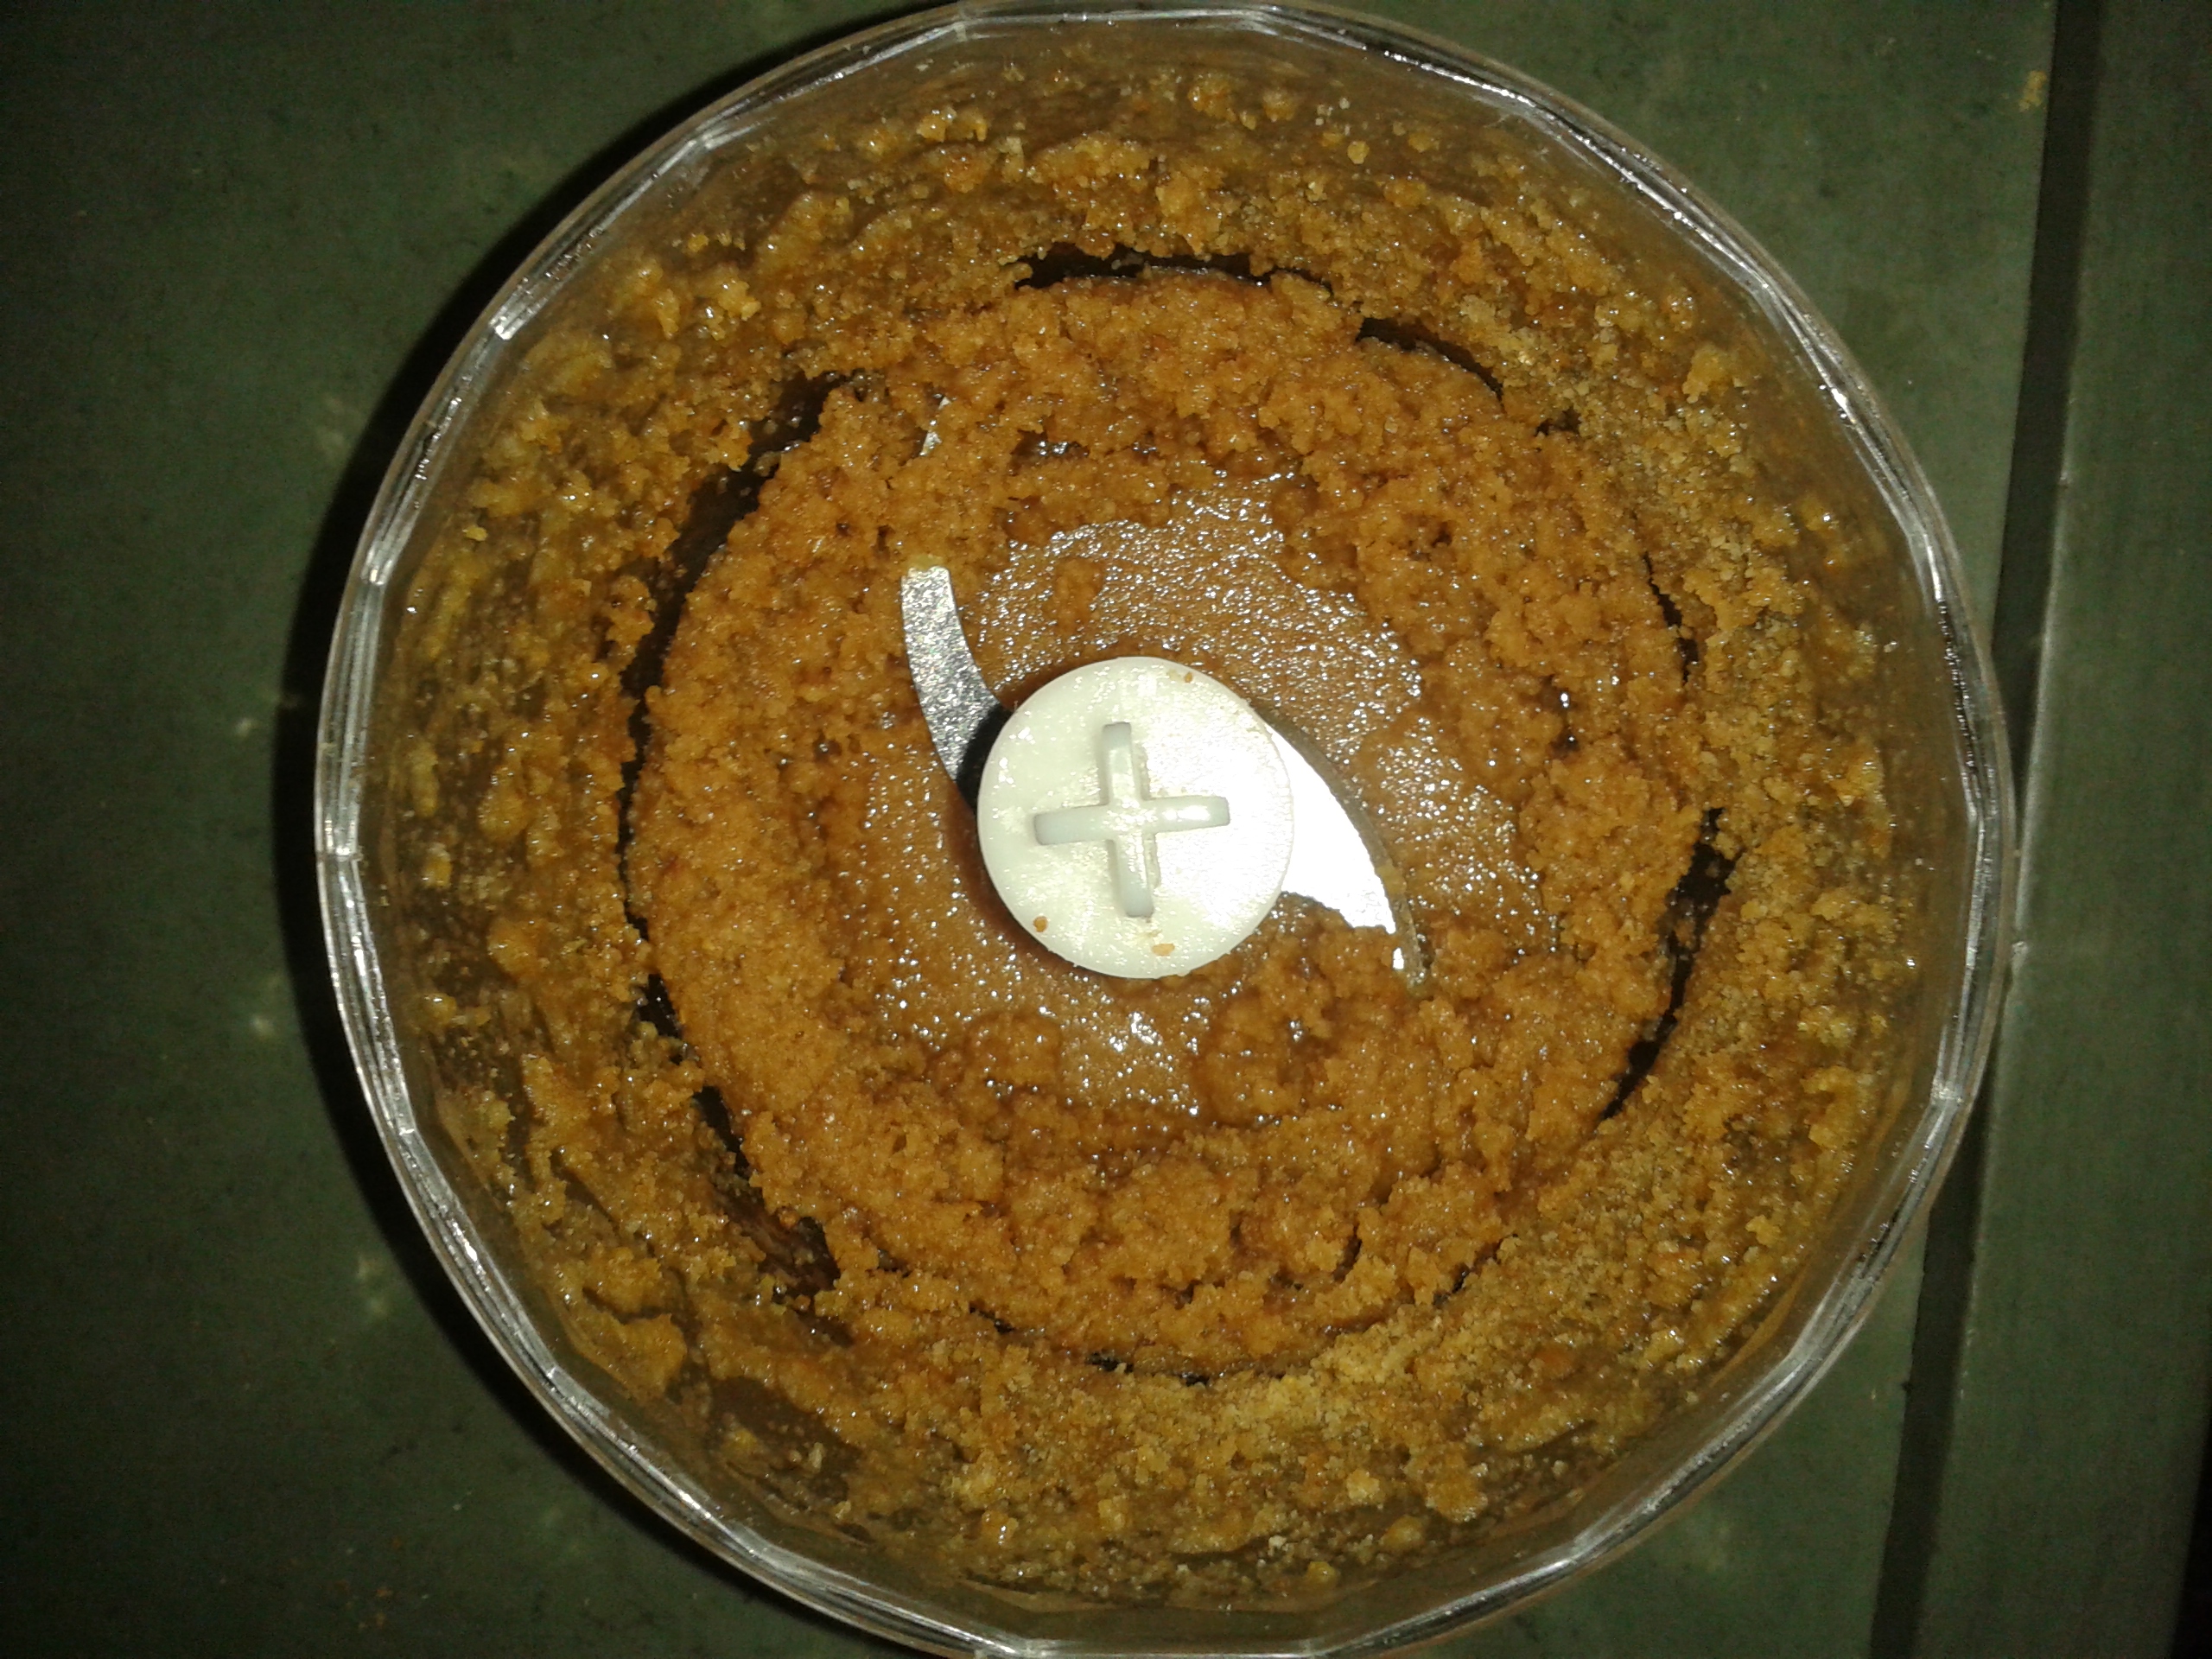
• Finely chop the vegetables (Chick peas, chillies, onion). I like to run them together in a chopper

appam ground
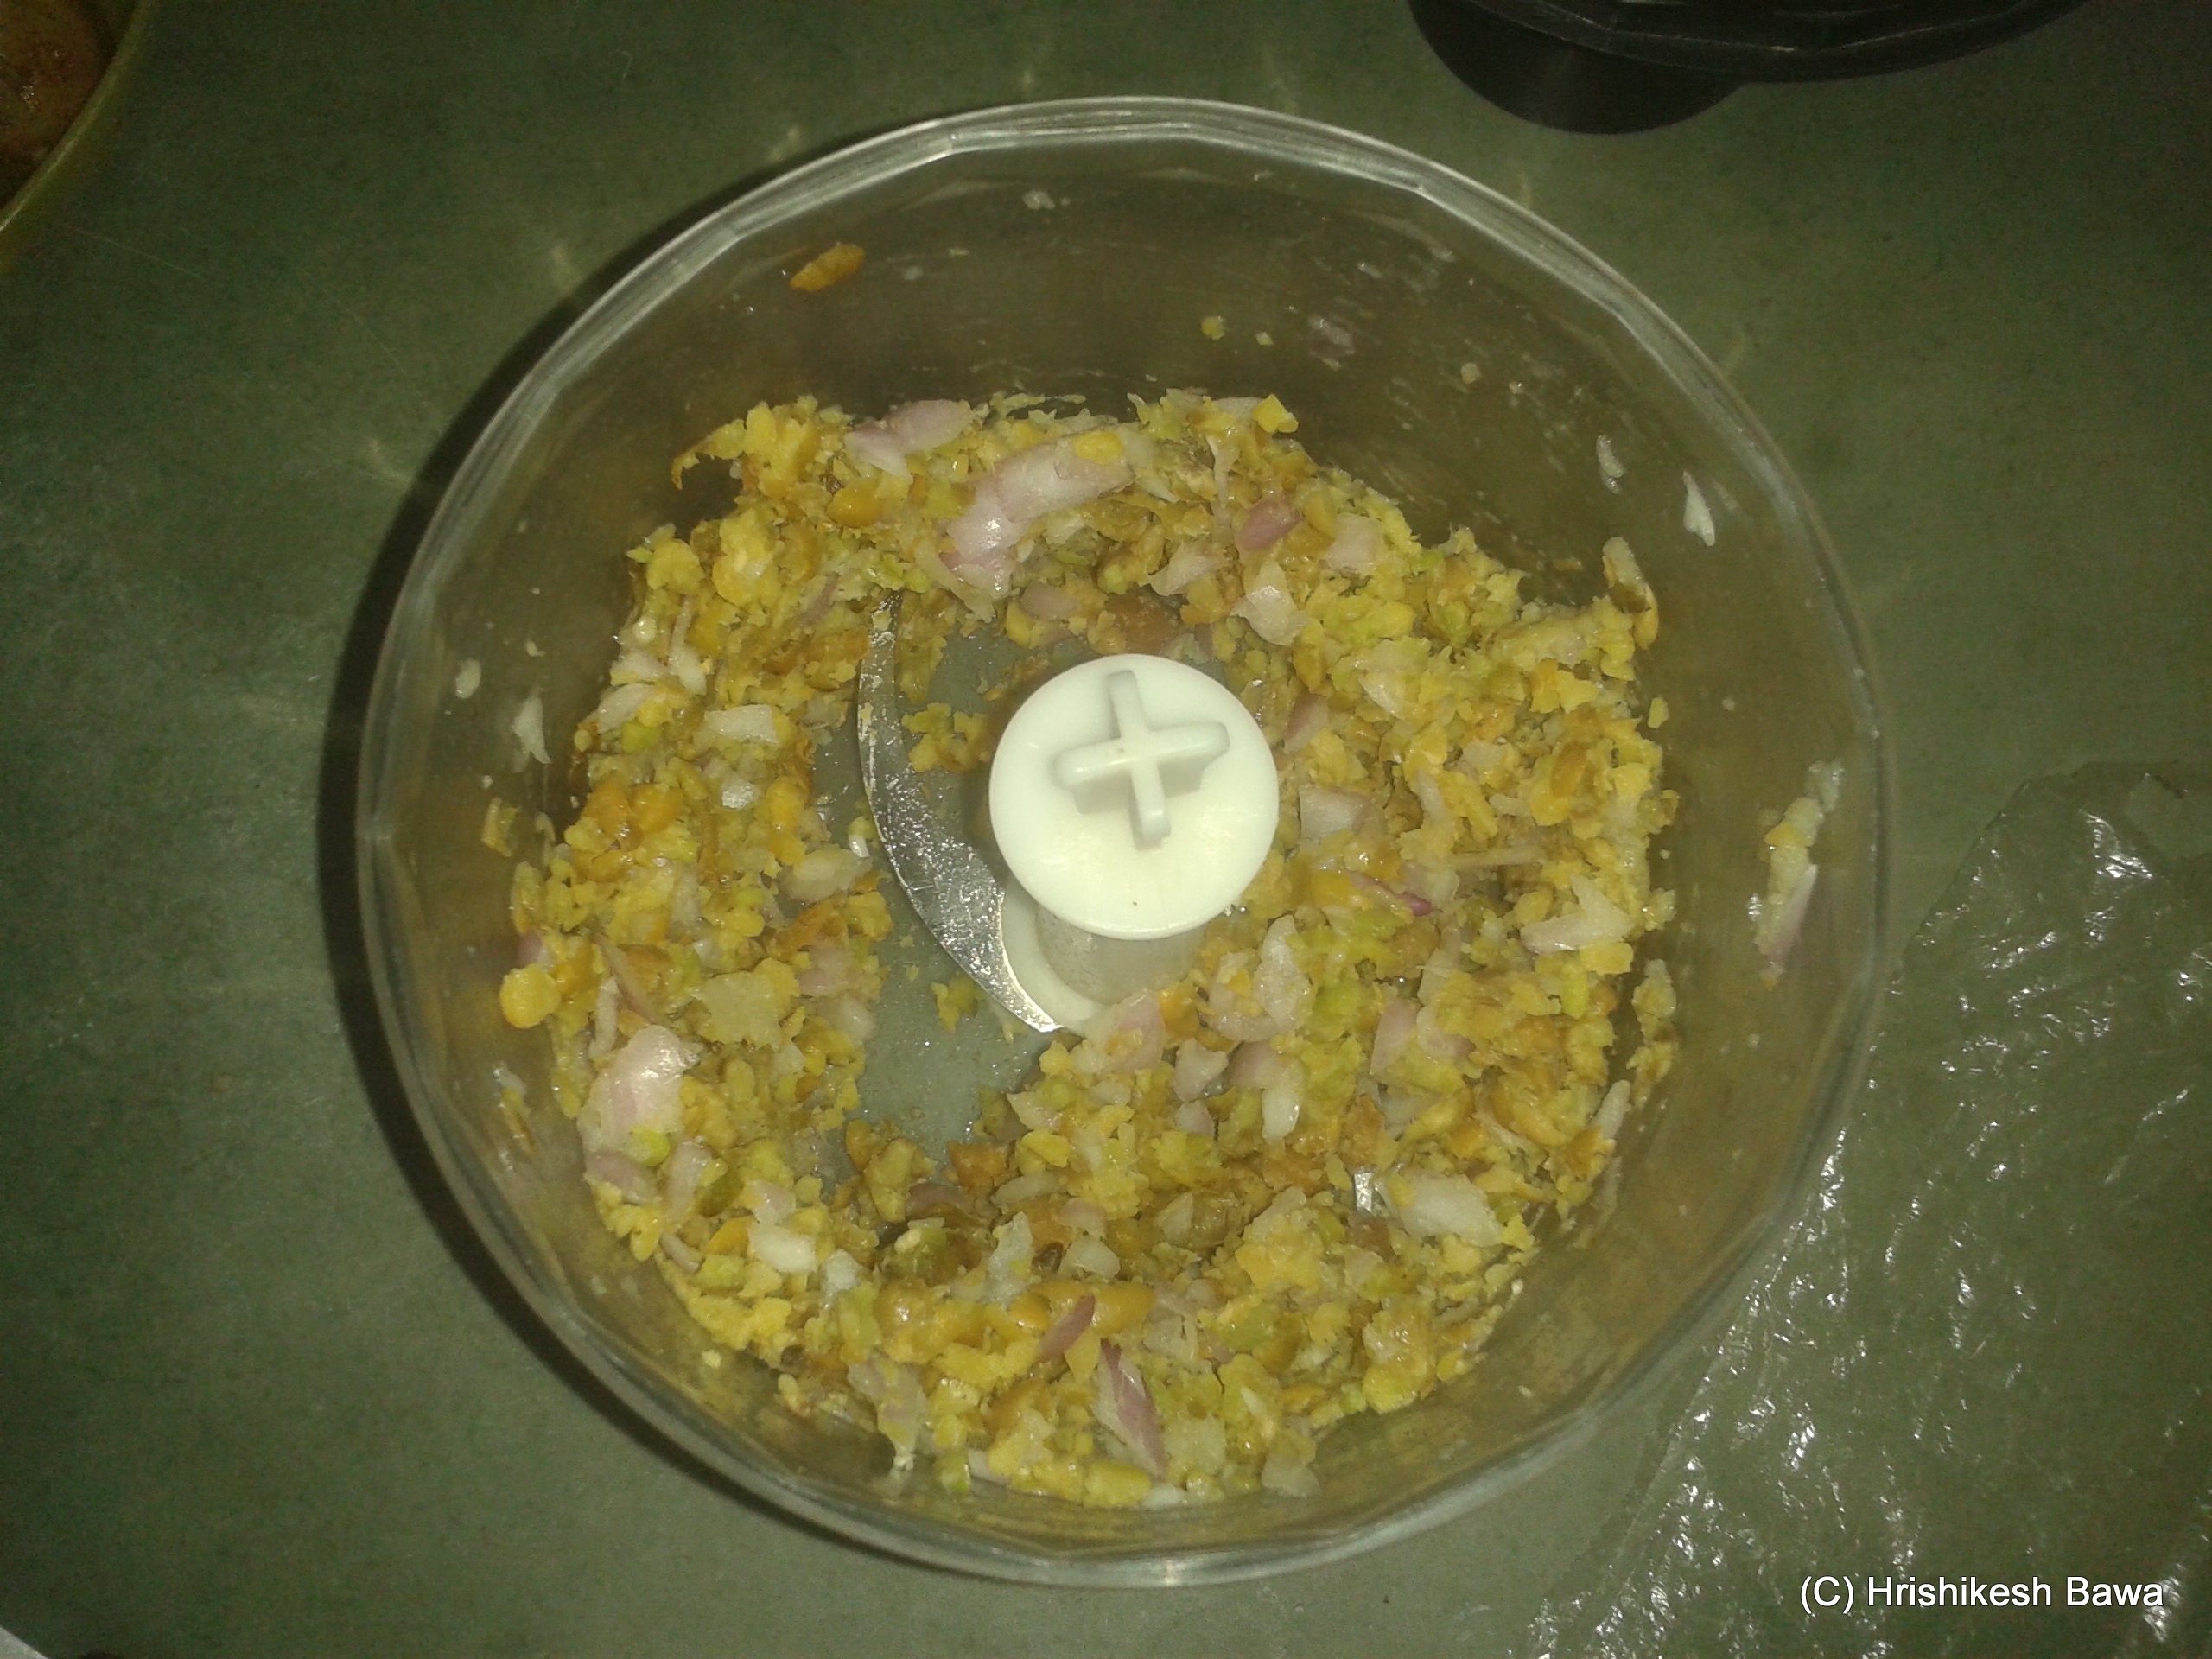
• Place the vegetables in a large bowl, and add the spices.
• Add Semolina and the crushed peanuts. Mix well.
• Add the tomato puree and mix well.
• Add half a cup of water. Mix the concoction so as to remove any lumps. It shouldn’t be too runny. Only add the other half cup of water if your mixture is too solid and cakey.

appam mix resting

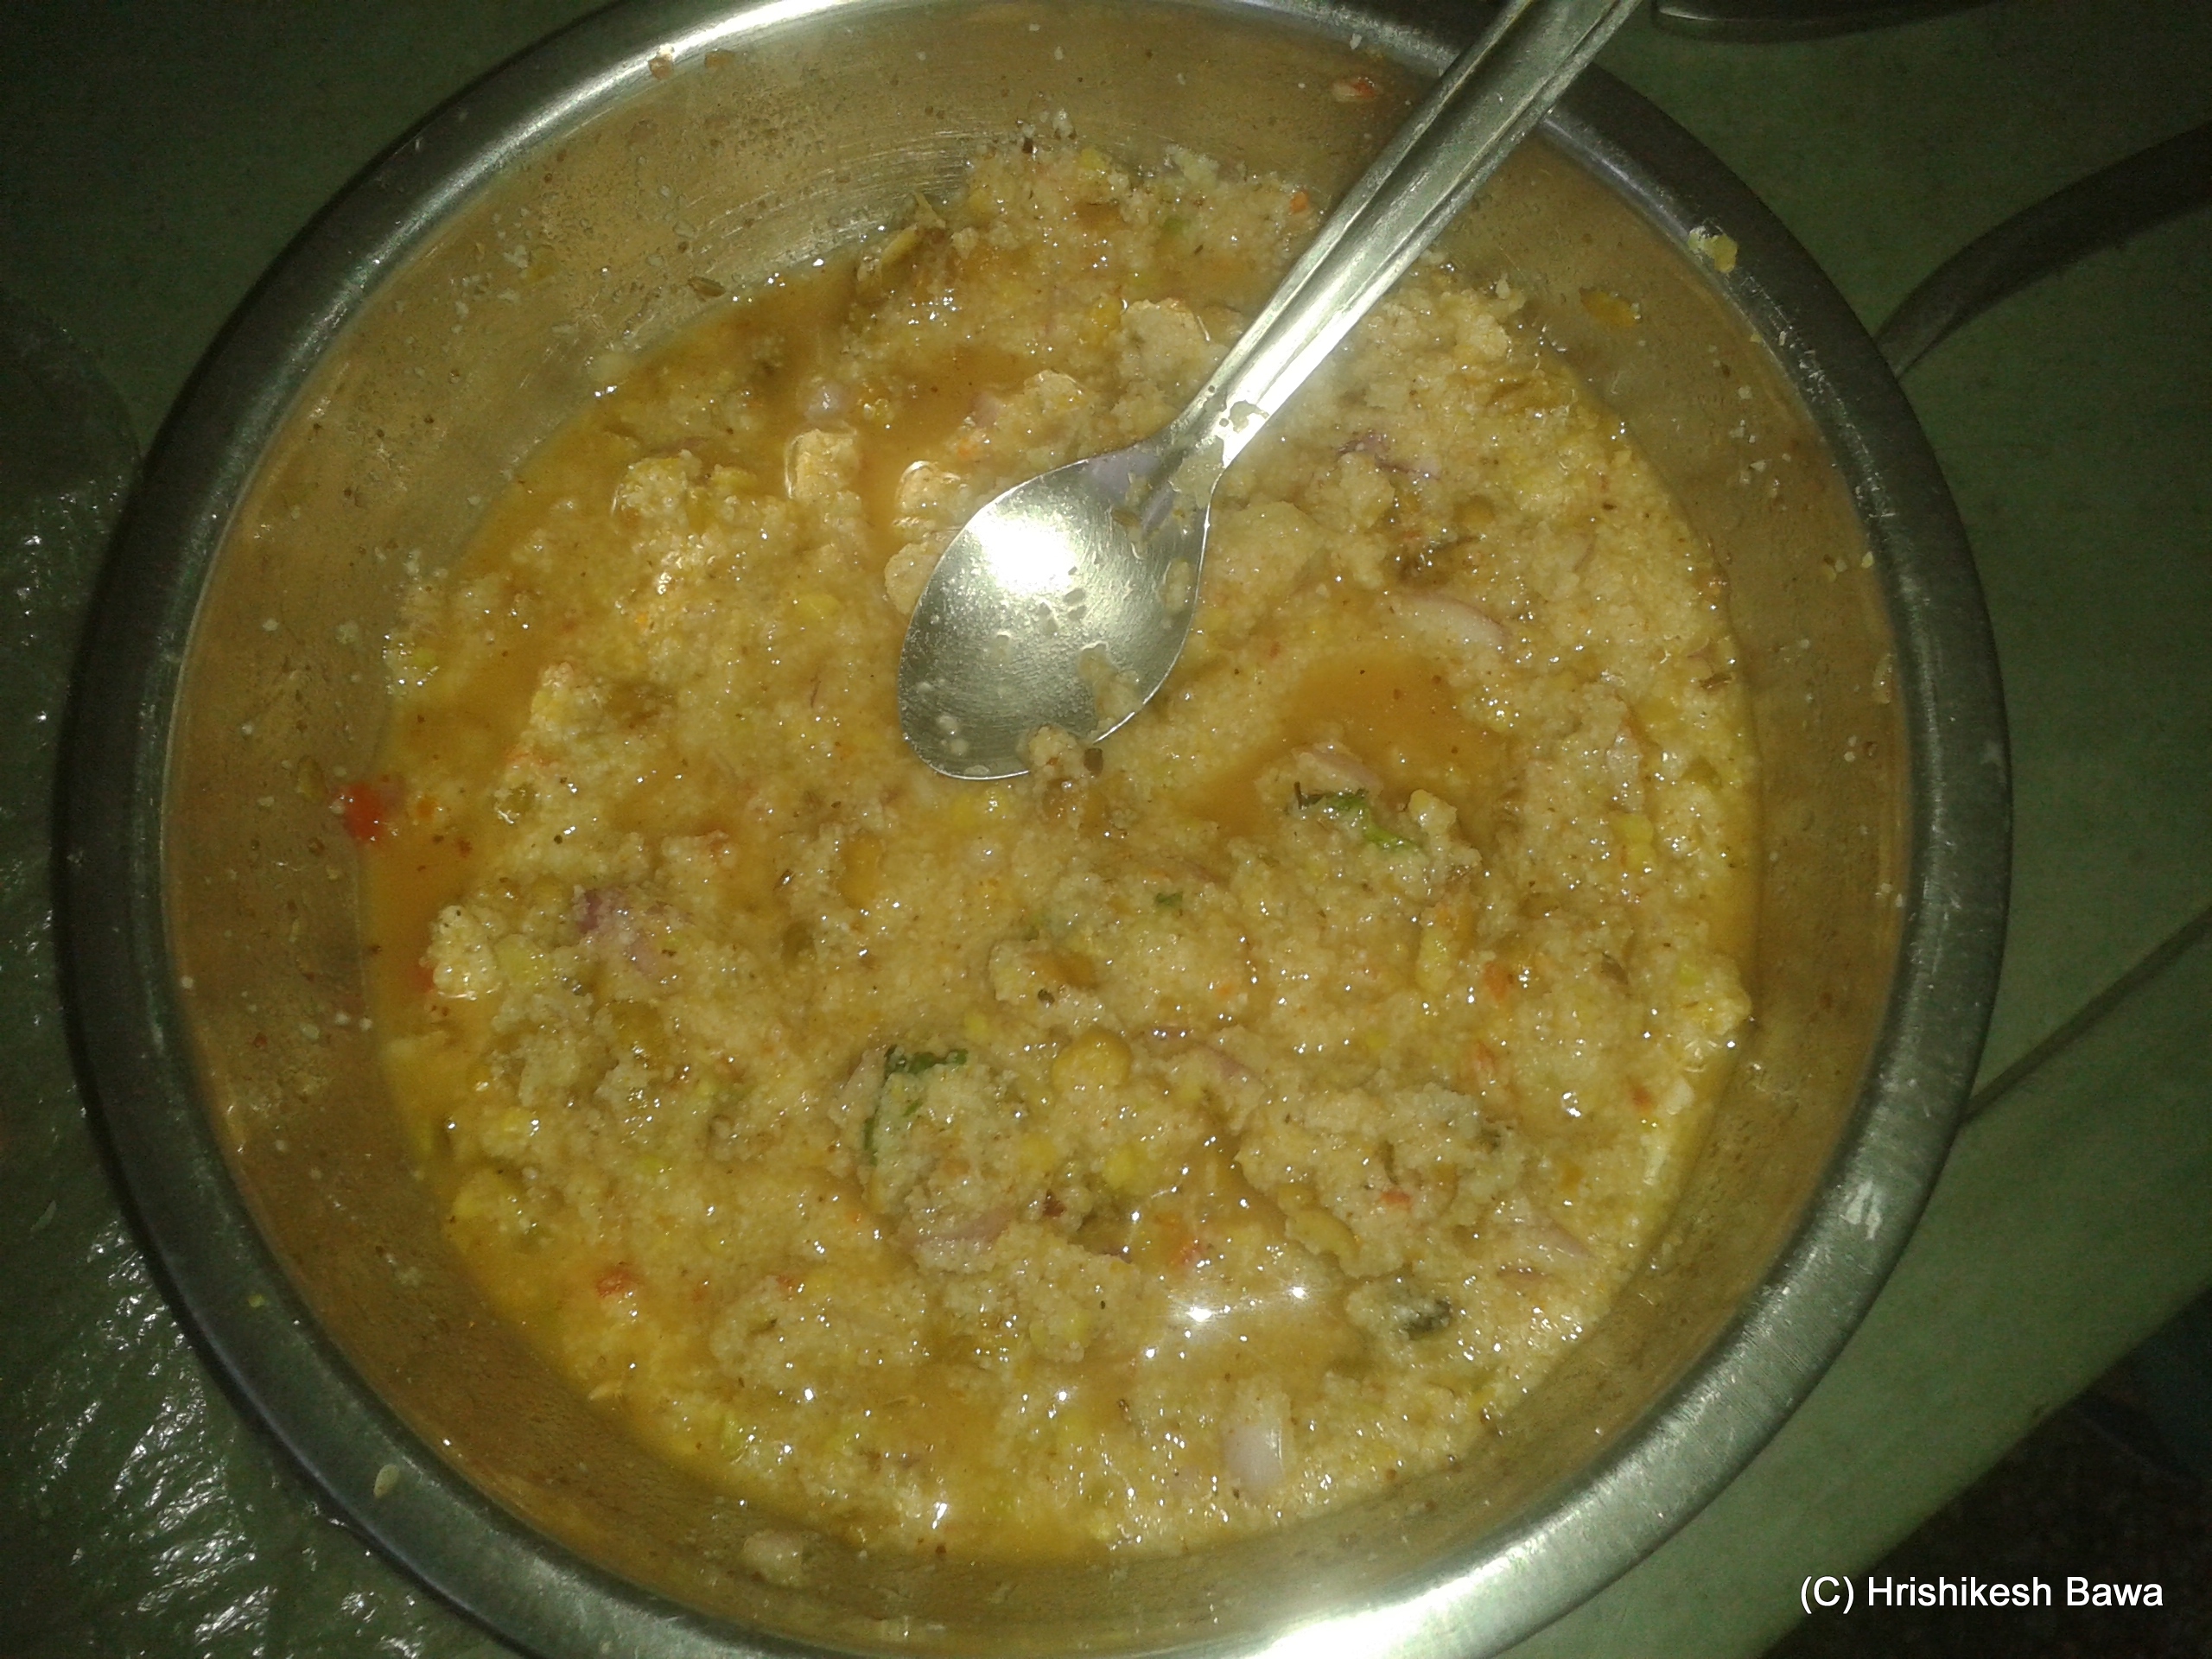
• Let the mixture rest for at least 30 minutes.
• Put the Appam patra on medium heat, and grease it with oil.
• Using a spoon, place a dollop of the mixture in each mini bowl.

appam cooking
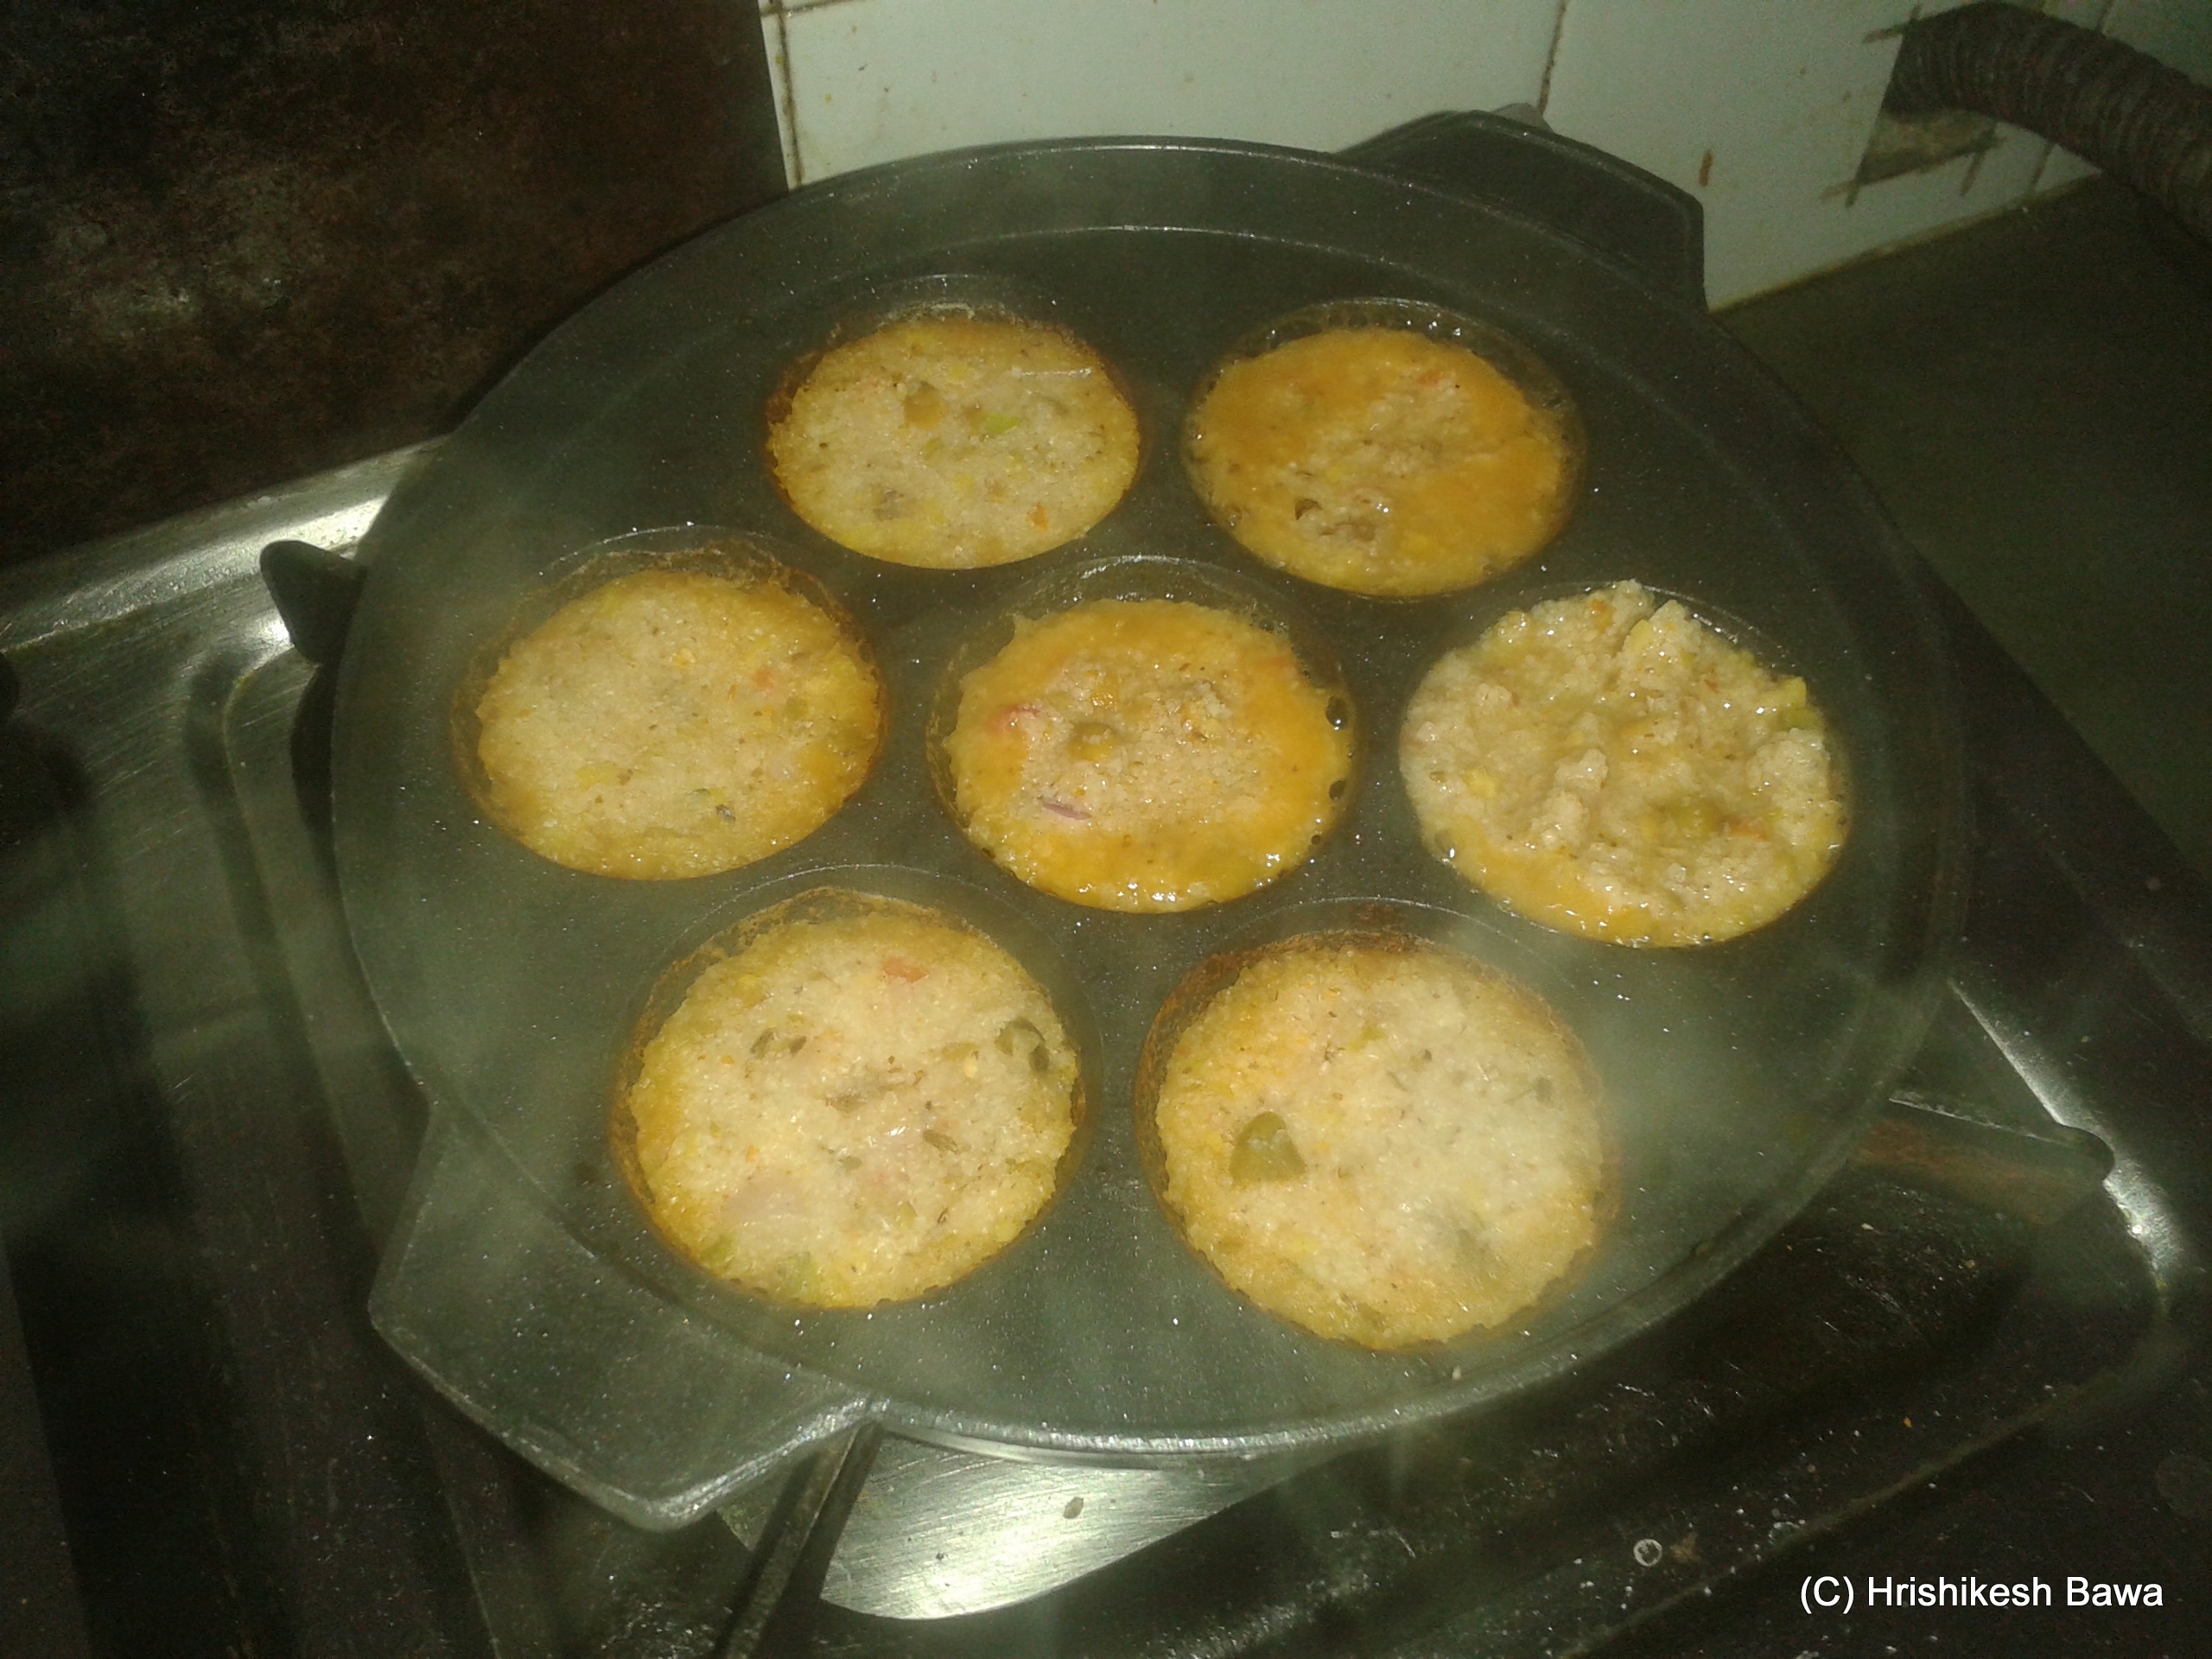
• The lower part should get done in 5 minutes. You will notice drying and browning around the edges when this happens.
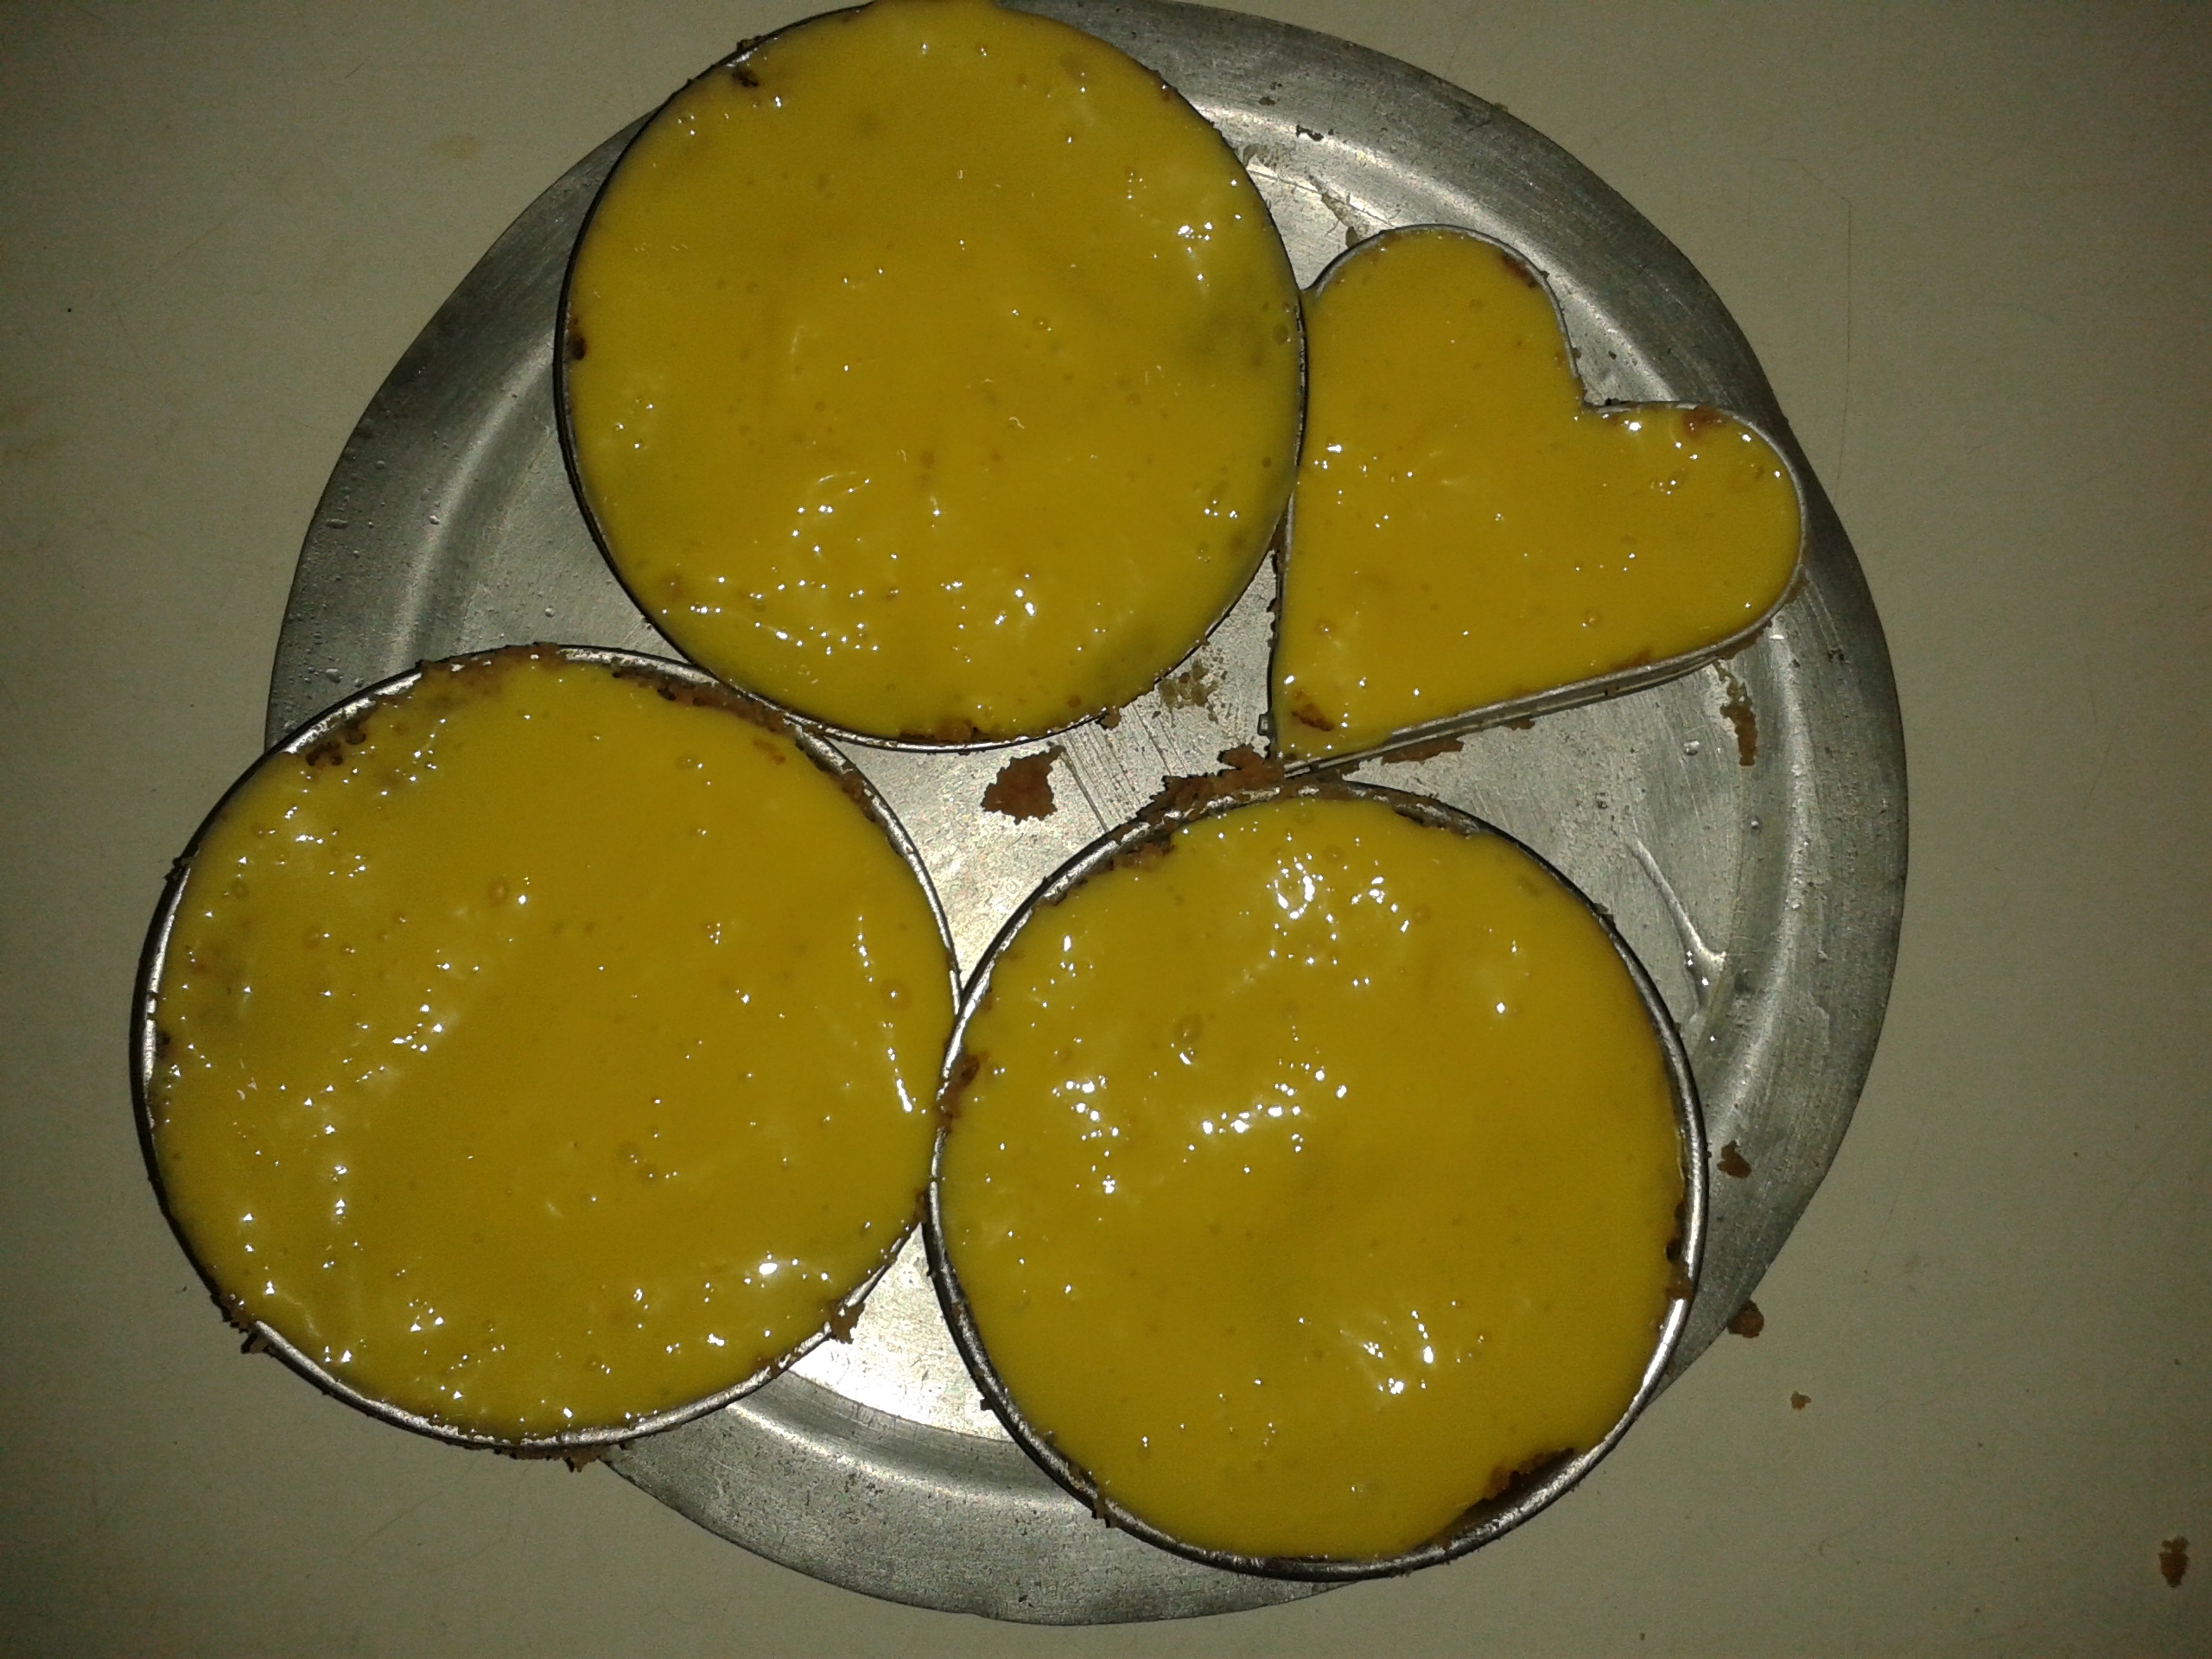
• Delicately over turn the dollop in the mini bowl.

appam done
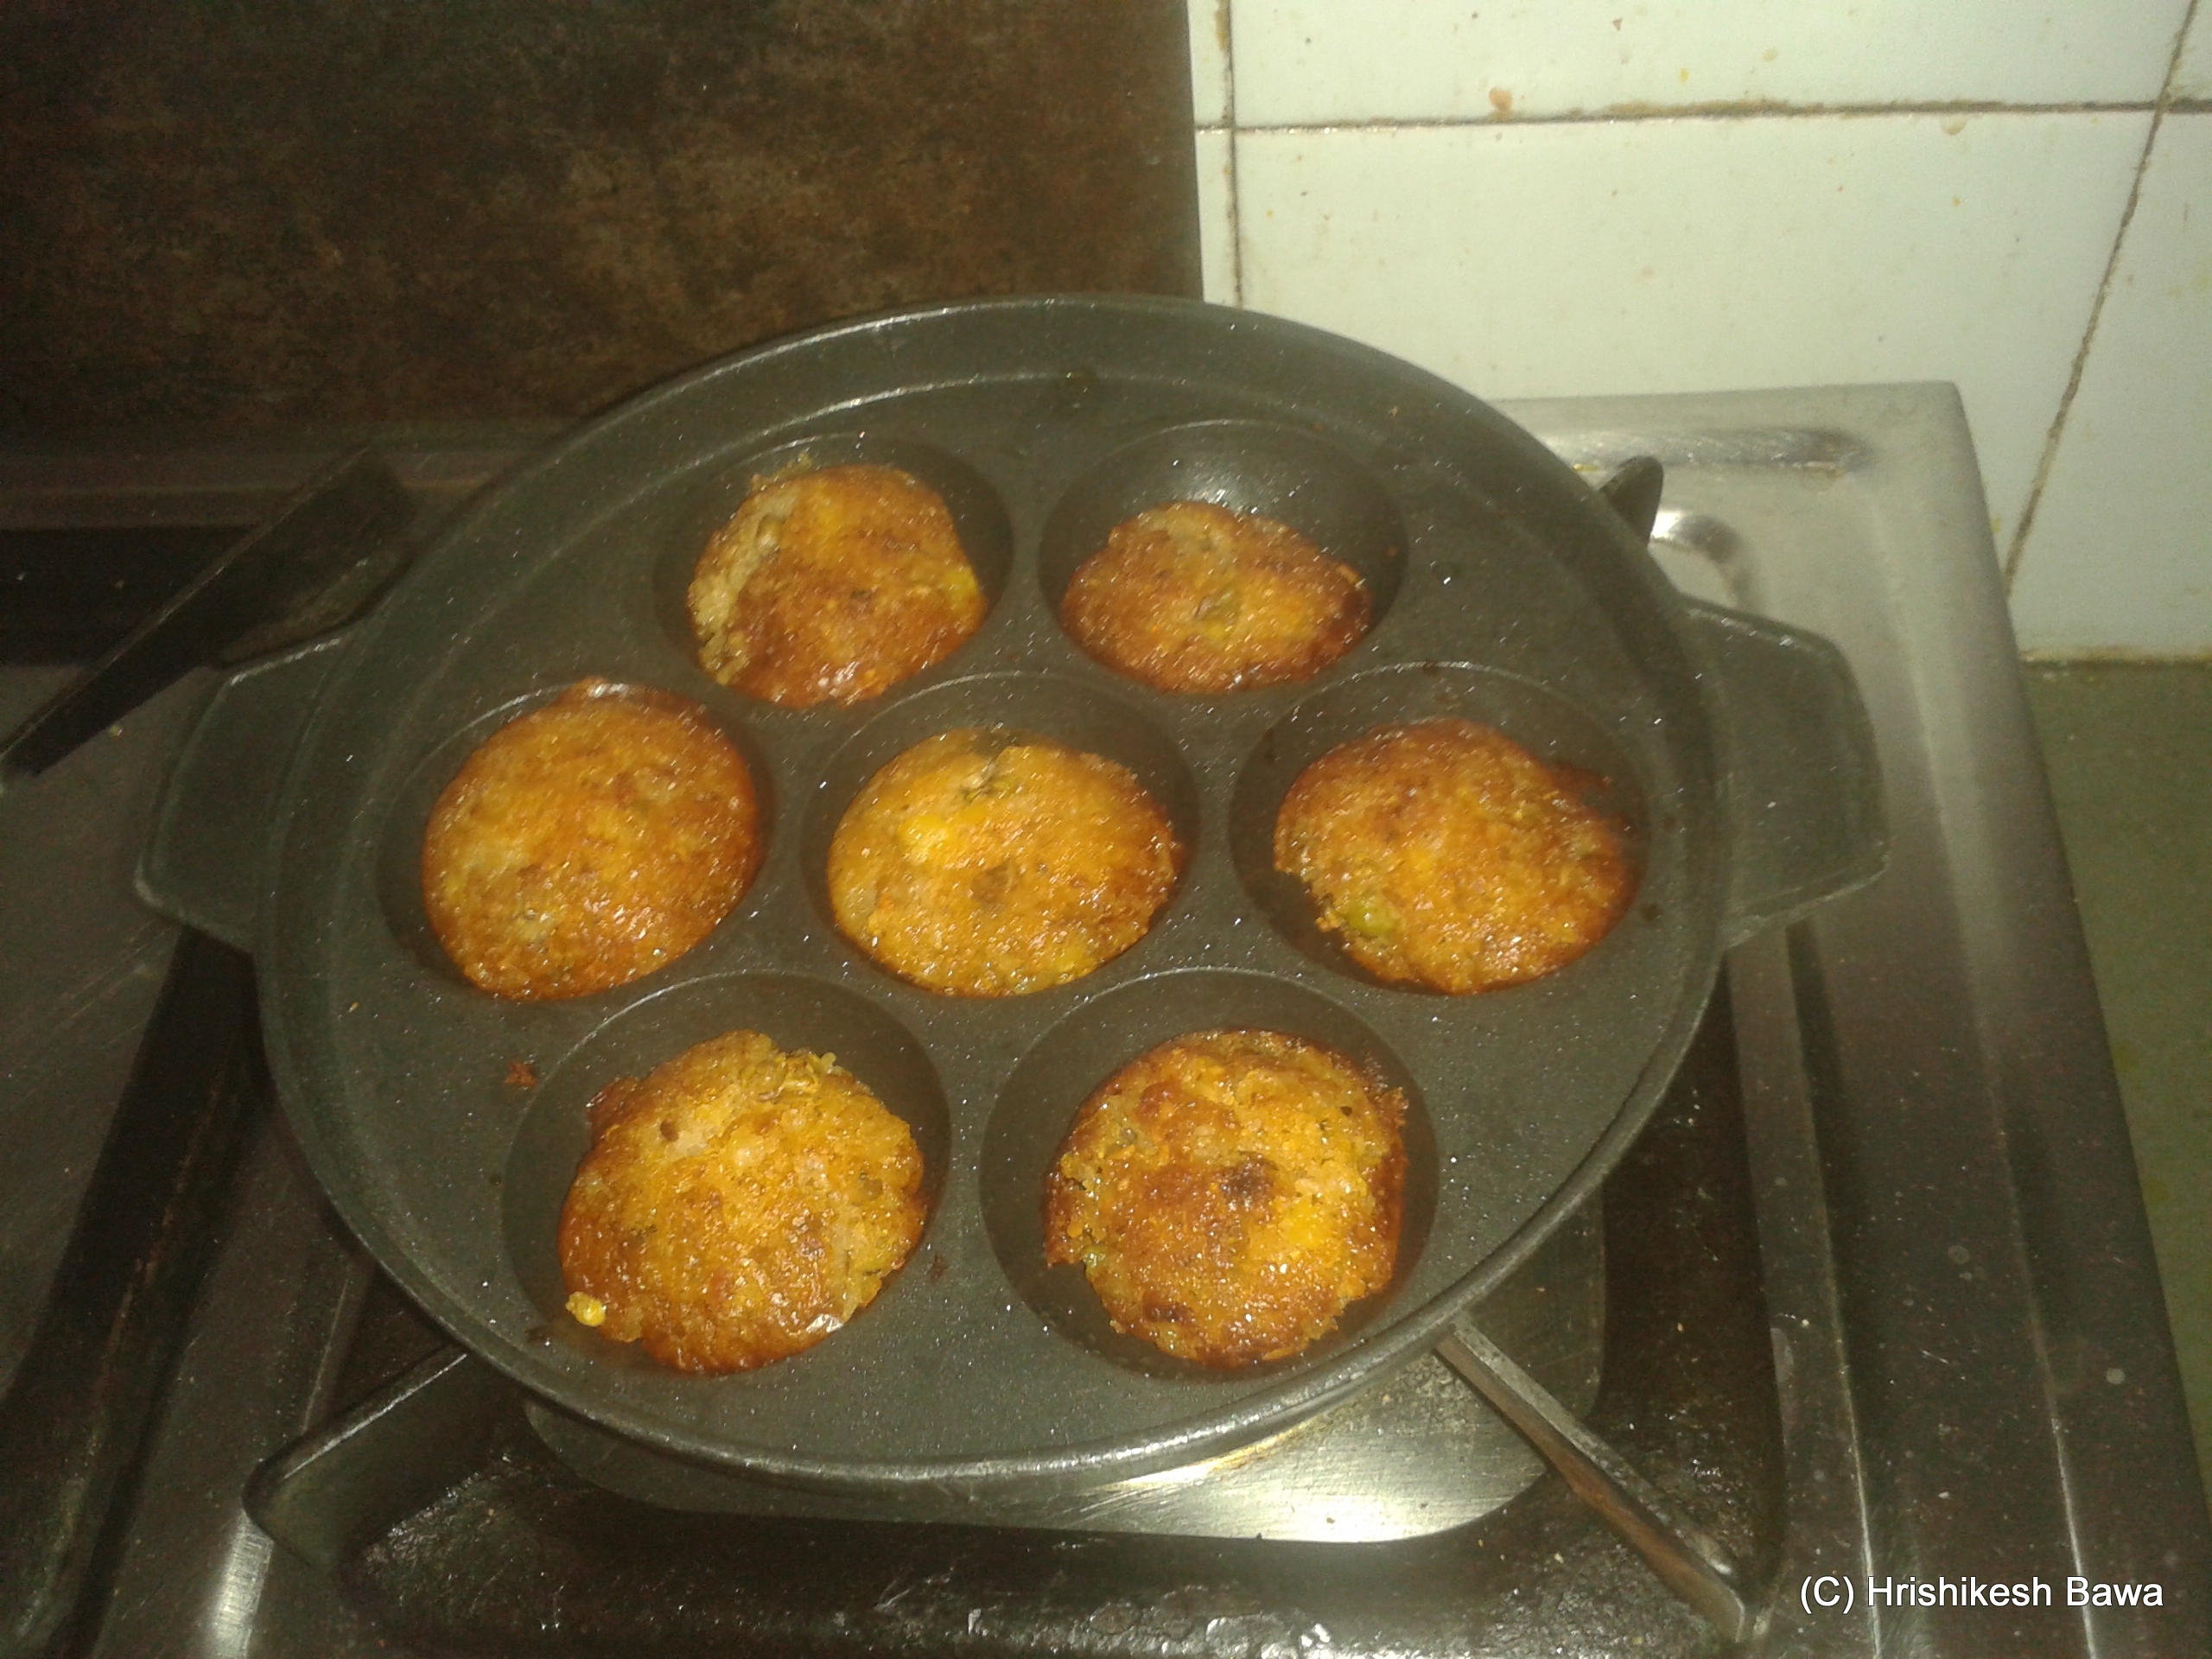
• Pour oil around its edges.
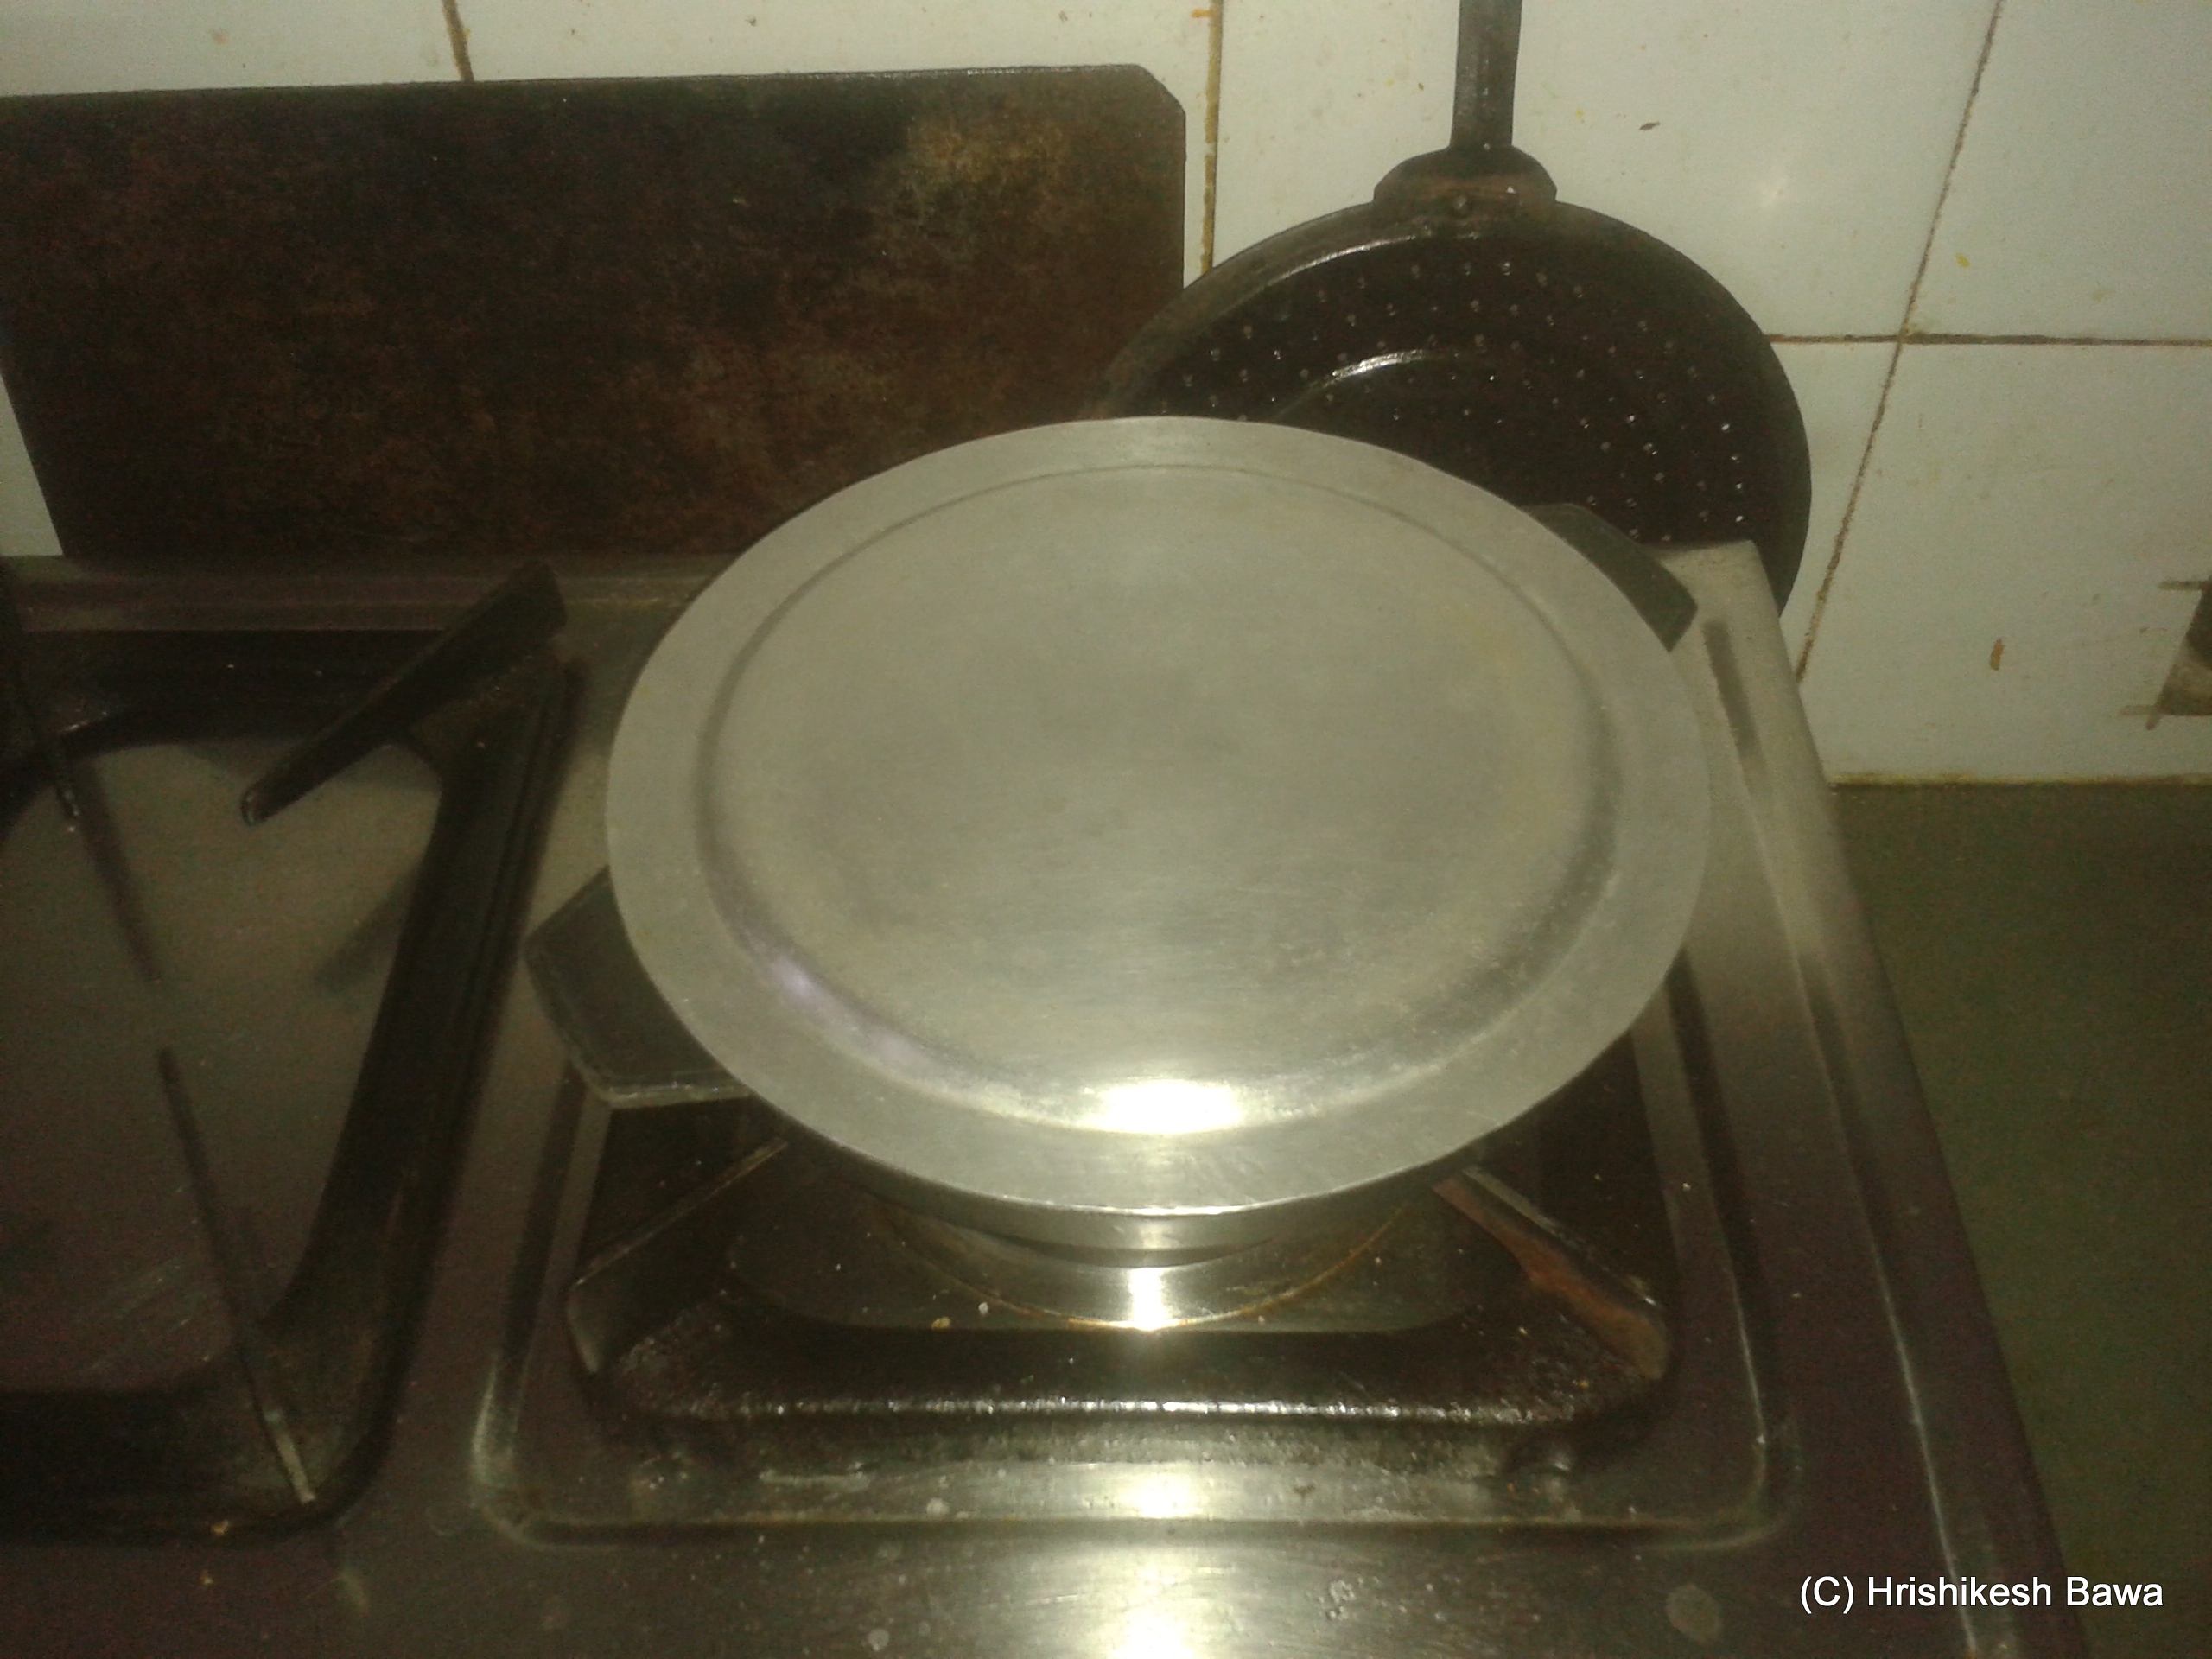
• You can cover it now with a lid if you want the Appe to be softer.

appam covered

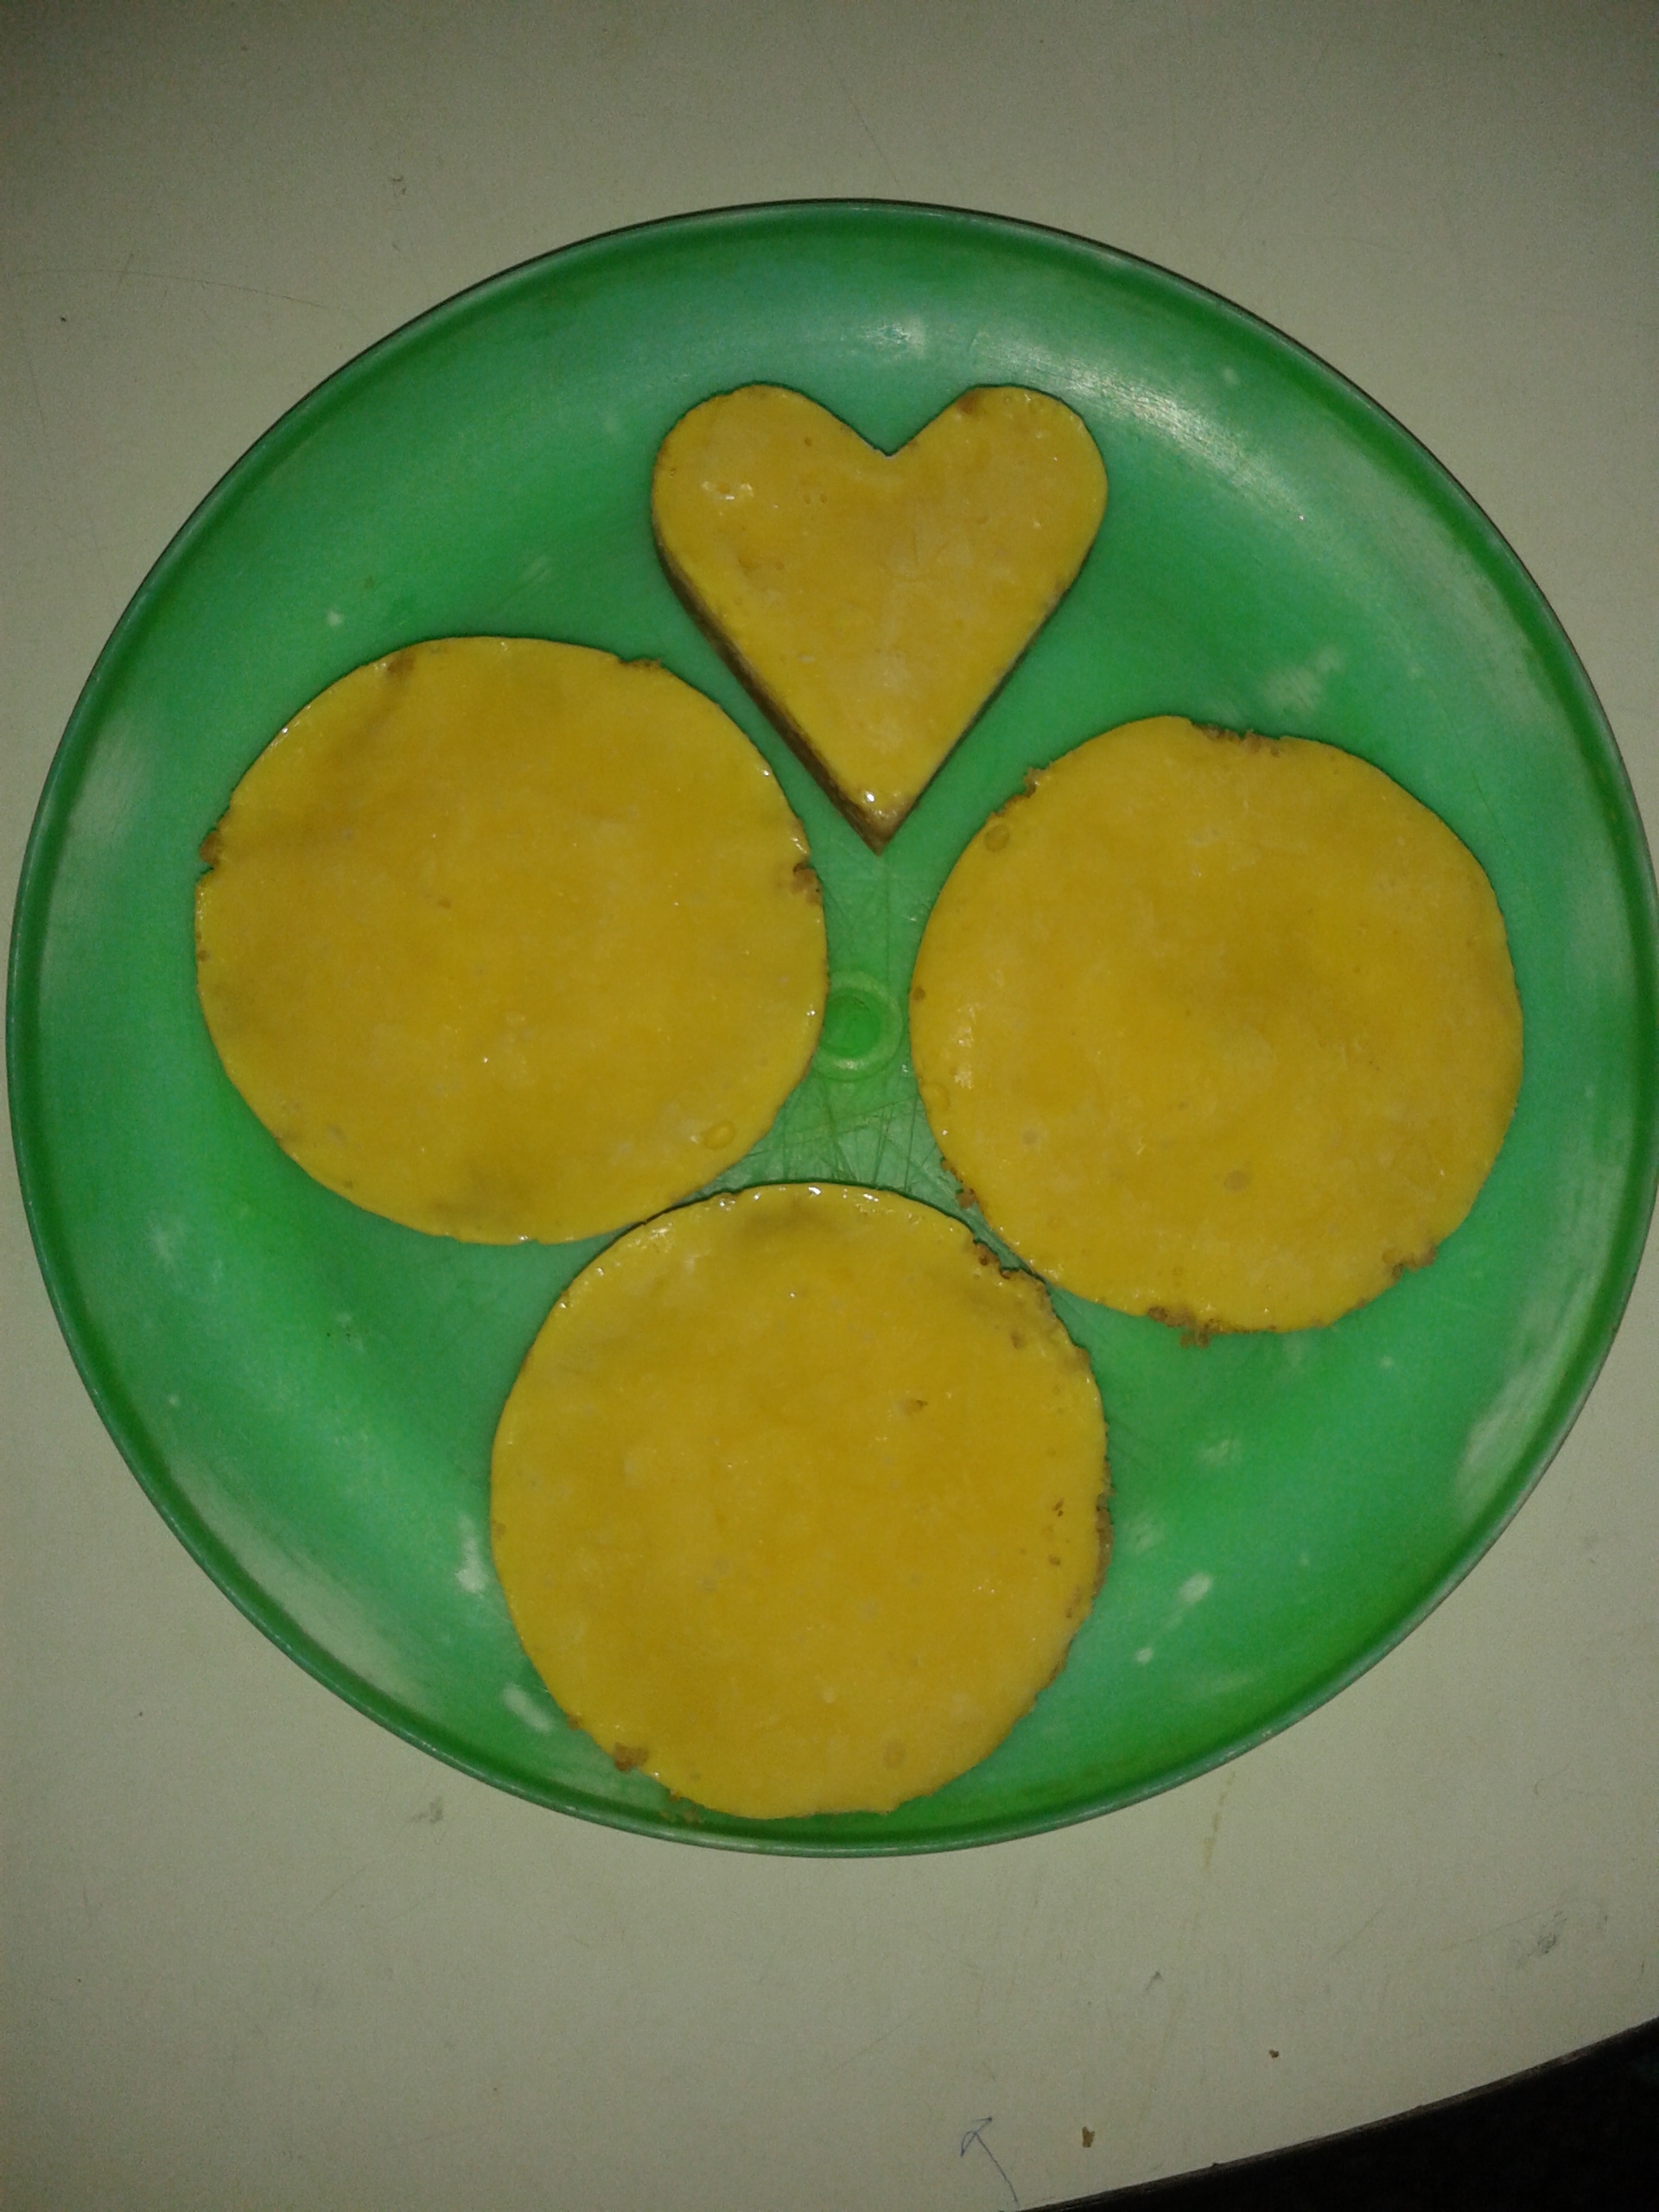
And voila, you’re done with the Appe. You can serve it with a chutney of choice.

appam all

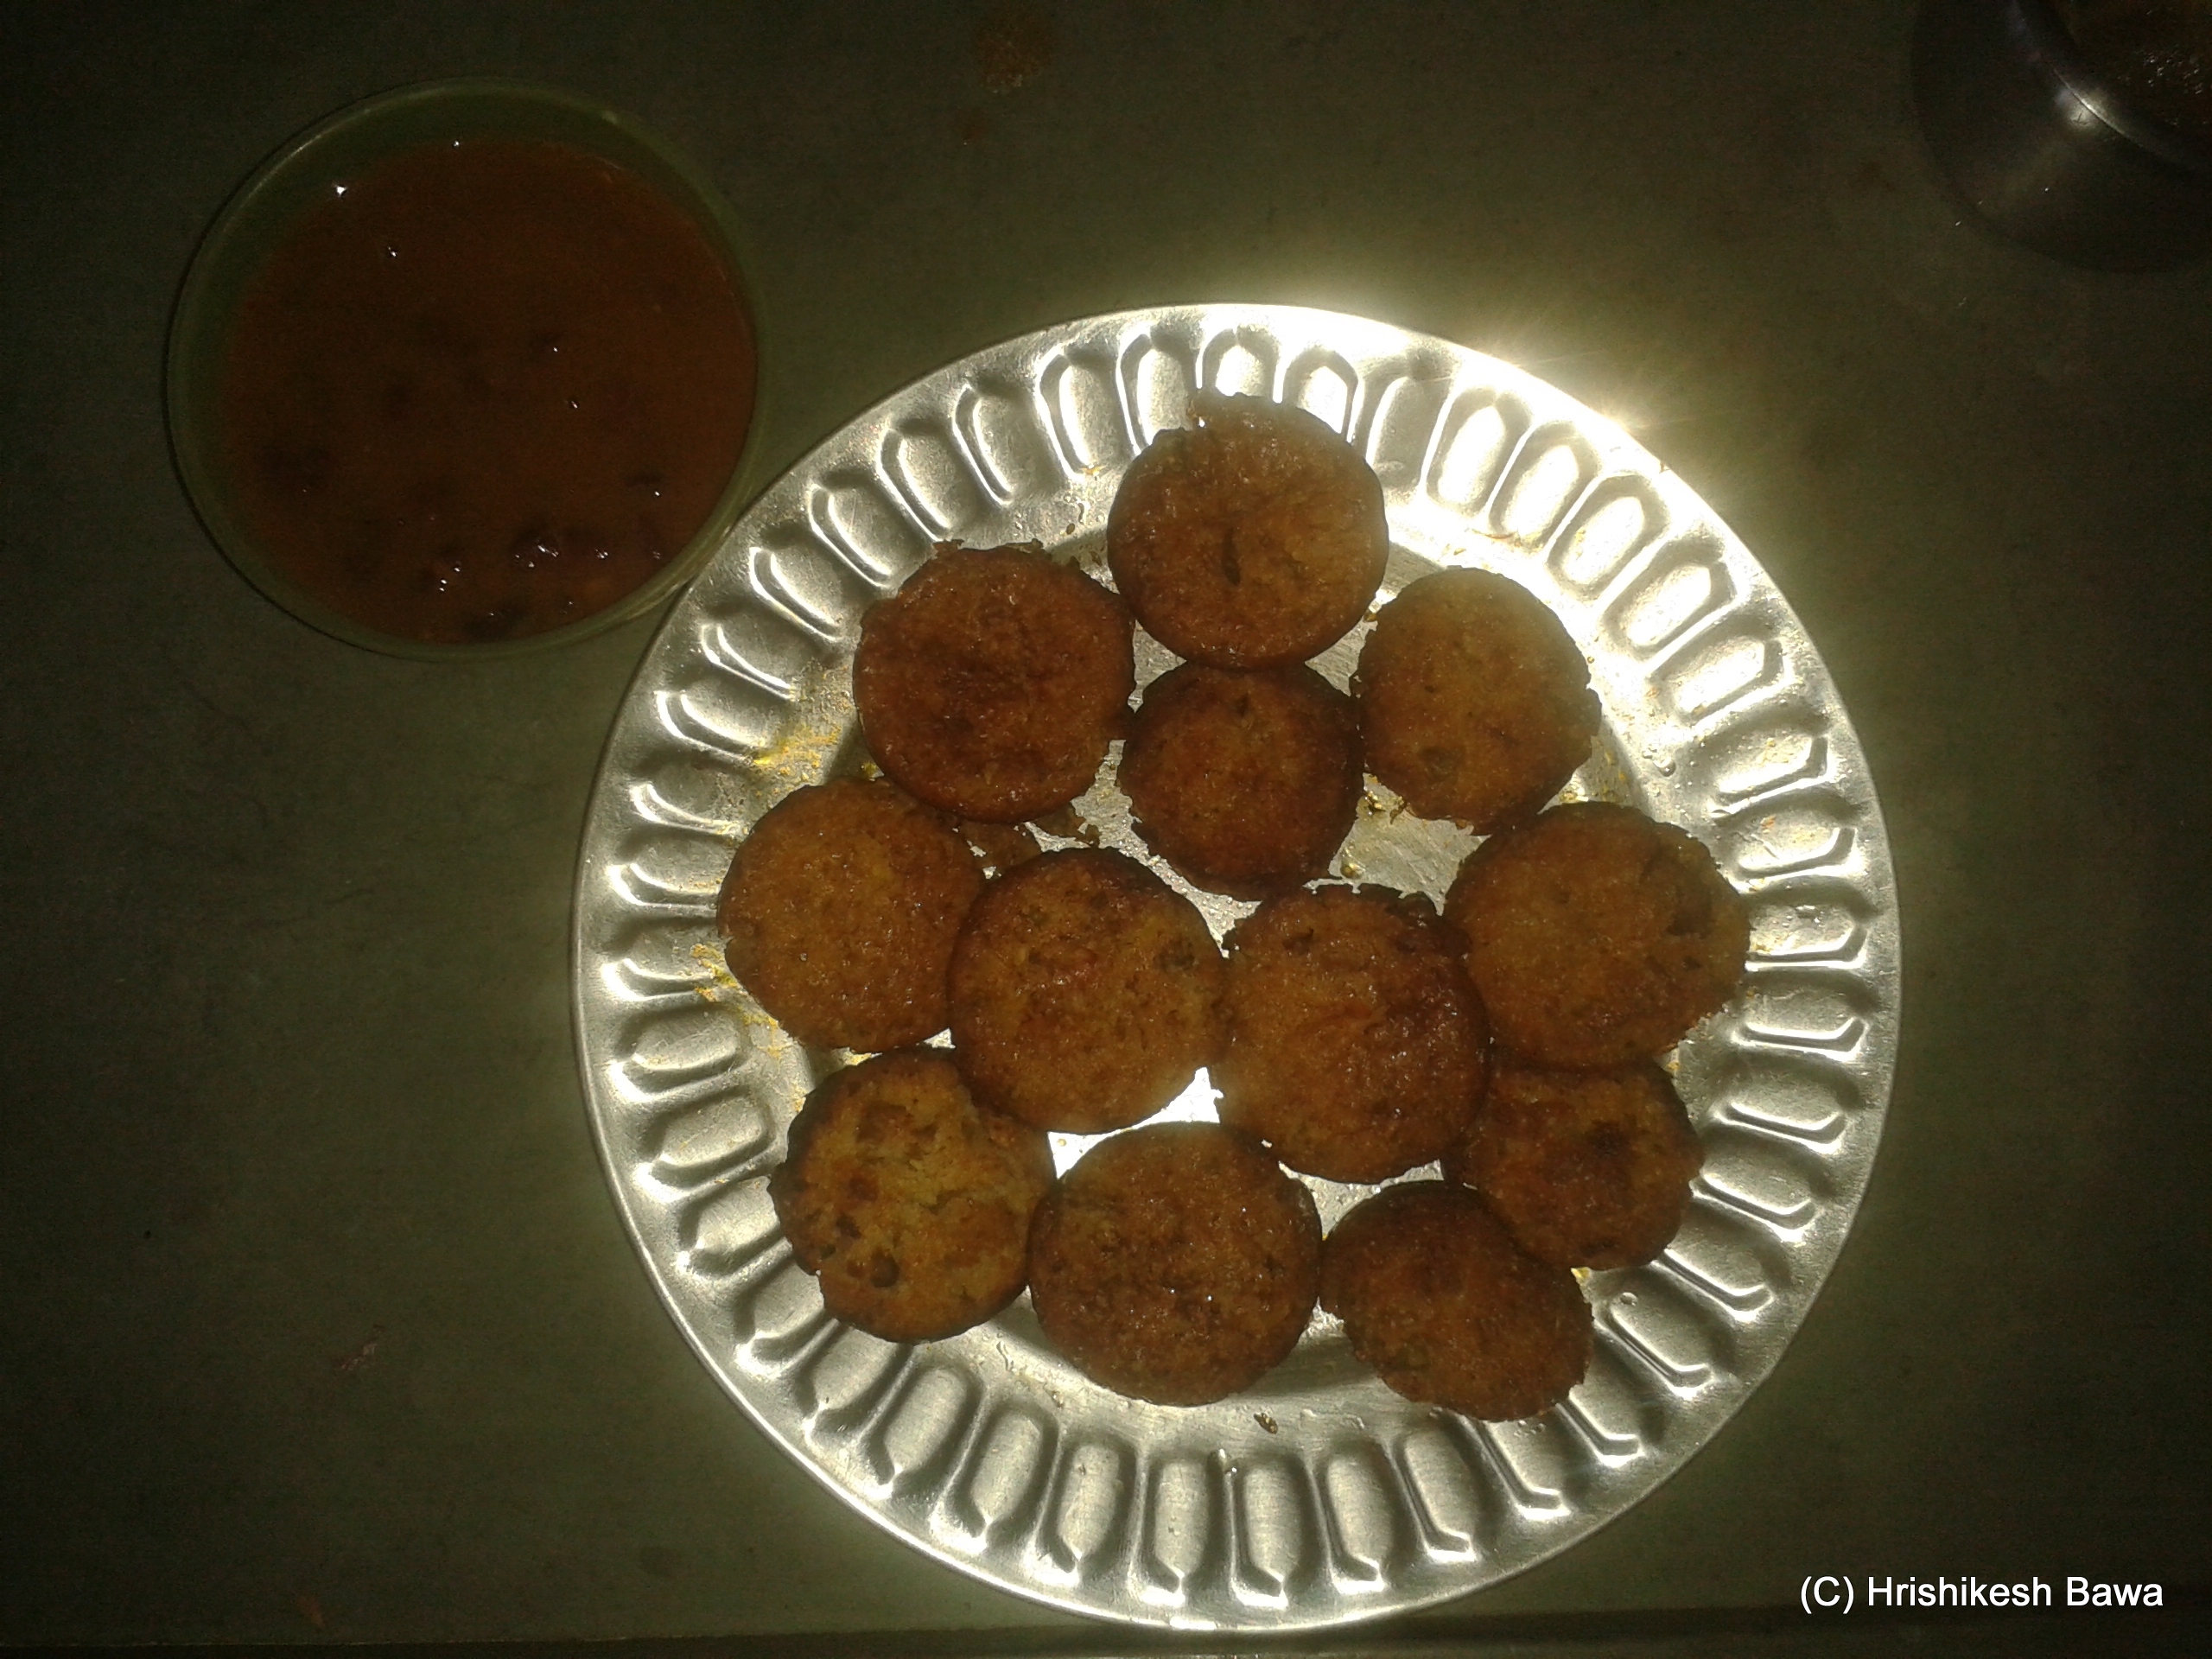
Since I had some leftover rajmas from the night before, I used that as a dip instead of going for a chutney.

appam plated

Happy eating 😀

Written for the A-Z blogging Challenge for April 2014. I would not have been part of this challenge had it not been for the nudging of Blogwati G, Shail Di, Janaki, and Kajal

Recipe: Stuffed Jaggery Paratha (Gud yo lolo)

Winters call for warm heavy meals that make you feel fuzzy and comfy on the inside. When mom was young, grand mom used to make different foods for her and her siblings. One of the most loved things she made was ‘Gud yo lolo’. It is more like a stuffed paratha, and hence lolo (which is actually bread made with the ingredients incorporated in the dough while kneading) is a misnomer. ‘Gud’ stands for Jaggery. So this is a sweet bread stuffed with jaggery. I have inherited my mother’s love for this, and this is the recipe for it. The pictures are of mom making it.

Ingredients:

  • Whole wheat flour – 1 cup for each paratha.
  • Water – to knead flour.
  • Jaggery – 2 tablespoons for each paratha, shaved or thinly sliced.
  • Ghee – for roasting and flavor.

jaggery

Process:

  • First we need to knead the dough for the parathas. You have to make it in the same manner as you would make for a roti. I am personally very poor when it comes to making rotis, so you can make it as shown in this wiki-how, or in this video:
  • Take a ball of the dough. Roll it flat.
  • Sprinkle the jaggery shreds/slices on one hemisphere. Leave 1 cm from the border which will be needed for sealing. We need thin shreds/slices so that the jaggery melts easily and makes for a gooey filling.

rotiwithstuff

  • Cover this filling by closing the roti with the un-stuffed end and for a D.
  • Seal this by either crimping it with your hands. For that pull a small segment out, and fold it back upwards. You can alternatively use a fork to and apply pressure to seal it.

crimpingon

  • Heat a tava (pan), and dab a little ghee on it. You can use a nonstick tava, and use few drops of oil but ghee leads to better flavor.
  • Spread the melted ghee on the tava, and place the paratha on it.
  • Gently move the paratha every 30 seconds with a spatula to prevent it from sticking. Add ghee as needed.
  • Flip it after 2 mins. You will know it is done when the surface darkens with a nice sheen. There will be dark brown spots on it as well.

roastedroti

  • Heat this side in the same manner as above. The paratha may puff a little.
  • Take off the tava, and enjoy.

servedlolo

You can choose how to have it. You can break it open with a spoon, and let the warm gooey jaggery paste flow out, and eat with the broken paratha. Or you can bite in to it, and let the paste flow on your fingers and lick them clean later. I find the second manner more satisfying.

flowingout
The key here is that if you break it open the moment you take it off the tava, the molten jaggery might be too hot for you. Let it stay for more than 5 mins and it will cool and start to solidify. Generally you can wait for 1-2 mins so that it warm enough to flow down your fingers but not hot enough to hurt.

Best had when hot.

Recipe: Brinjal and potatoes in a gravy reduction

I am not overly fond of brinjals. I try and avoid it if I can, but over the years one particular style of preparation has me grow fond for it. I will share the recipe for this method.


Ingredients:

  • Brinjal – 1 , cut into discs/slices
  • Potatoes – 2 medium, cut into the same amount as the brinjals
  • Onions – 1 small, finely chopped
  • Garlic – 3 cloves, finely chopped
  • Tomatoes – 2 small
  • Green chilly – 1, chopped
  • Red Chilly powder – 3 tea spoons
  • Turmeric powder – 3 tea spoons
  • Black pepper – 3 tea spoons, finely ground
  • Coriander (Dhania) powder – 2 tea spoons
  • Garam Masala powder – 2 tea spoons
  • Salt – to taste and for salting
  • Oil – to fry
  • Water – 2 cups

Process:

Cut the brinjal in slices 1 cm thick, and make diagonal cuts on it (as shown in the picture). Sprinkle salt on both sides and set them aside for at least thirty minutes. This will neutralize the unwanted excess taste.

brinjals (2)

Heat oil in a pan/kadhai. Lower the brinjals slices in to it once the oil is hot. Stir fry till the brinjals are golden brown. Flip them so that they are golden brown on both sides. Since I have a small kadhai I fried them in two waves

brinjals (4)

Take out the brinjals and set them aside. Peel the potatoes, and slice them. Make the same cuts on them as you did on the brinjal slices. Fry the potatoes in the same oil till they are golden brown on both sides and have a crisp outer layer.

brinjals (5)

Take out the potatoes and set them aside. Do not mix them with the brinjal.

Cut the tomatoes and put them in a grinder jar / chutney maker. Do notadd water. Grind them into a thick dry paste/chutney. The texture you’re looking for is similar to that of a salsa.

Heat oil in a pain. Add the onions and garlic. Once they change color, add the chopped chilly too. Mix well.

brinjals (7)

Add the tomato paste. Add all the salt and spices, and mix well.  Leave one teaspoon of all spices aside, we will need that later. Add the fried potatoes and mix well. Add water and bring to boil.

brinjals (8)

Add the brinjals to this gravy. Place them so that they are just below the surface of the gravy. Sprinkle the spices you had set aside on them.

brinjals (10)

Cover with a plate/lid and reduce the heat to a simmer. Leave it like this till the gravy is reduced and sticks to the potatoes and brinjals. It will also make them softer. You will need about 5-10 mins for it reduce.You can add chopped coriander leaves or mint leaves at this stage if you like.

brinjals (11)

Serve with rotis/naan or any other bread of your choice.

brinjals (1)

Recipe: Chocolate Fudge

As part of the Diwali traditions, sweets are bought and shared with friends and family. As usual, we used the sweets I get from work, along with some sweet chiki we make at home. This year I thought of doing something new as well. Chocolate has long been a favorite of mine, and having a celebration without it seems unfair. This is the recipe of the chocolate fudge that I made:

Ingredients:

Milk Chocolate – 100 gms

Dark Chocolate – 50 gms

Fresh Cream – 1 table spoon

Nuts – 2 table spoons (Mixed and chopped)

Corn flakes/ Break fast cereal – 2 table spoons

Instant Coffee powder – 2 tea spoon

PS:

I used 44% Cocoa Dark Chocolate since the people I was to share with don’t like the bitter taste (:roll:). Please use 55% or 70% Dark Cocoa chocolates to get more of the bitter flavor.

Coffee powder has to be instant coffee/ freeze dry coffee powder you get which has to be only mixed in hot water/milk to be had. Do not use the coffee which requires the use of a filter.

You will also need 

Butter paper – 1 sheet

While you can directly pour the mixture into a vessel/bowl/plate for cooling and setting, it is better to use butter paper for lining as it will ensure that the fudge doesn’t stick to the walls and you can lick it off clean once you’re done. Licking off the remains is one of my favorite parts 😀

Process:

Chop up the chocolates. Mix the milk chocolate and dark chocolate slices.

fudge_choccut

Melt these chocolate slices either in the microwave or on the gas using the double boiler method.

Take a large bowl.

Fill with water, and put on gas till water starts to boil.

Place chocolates in a smaller bowl and place it inside the bowl with boiling water.

Use a spatula/spoon to press and mix the chocolates till they melt.

Do not expose the bowl with chocolates to direct heat.

Take a bowl and place butter paper on it. Press the butter paper so that it takes the shape of the bowl. Ensure that there are no cuts or tears.

Sprinkle all the nuts.

fudge_nuts

Add the coffee powder and cream to the melted chocolate, and mix well. Optionally you can add a bit of ground cinnamon or hazel nuts.

Pour the chocolate mixture on the nuts.

fudge_chocpour

We will keep the bottom layer crunchy with the nuts, and not mix them in the fudge.

Sprinkle the corn flakes / cereal of choice on top of this. As with the nuts, we will not mix them into the chocolate mixture but keep them as a top layer.

fudge_flakes

I mixed some Chocos along with my corn flakes for more flavor.

Cover this with the excess butter paper or plate and let it set in the fridge for 5-6 hours. You can peel off the butter paper and cut it into cubes before serving, or use a spoon to eat it from the butter paper it self. Since it takes the form of a disc, I just break it off and eat it with my hands.

fudge_final

Schezwan Roti Ribbons – Recipe

Sindhis make a dish called ‘Sail Fulka’ to use left over rotis. It  involves tossing torn bits of rotis in oil and vegetables with spices. I am adding a schezwan twist to this recipe.

Ingredients:

Rotis – 3 (preferably left over)

Tomato – 1, finely chopped

Green chilies – 1 tablespoon, finely chopped

Oil – 2 tablespoons

Red Chilly powder – 2 teaspoons

Salt – to taste (I used 2 teaspoons)

Schezwan sauce – 1 tablespoon

Process:

Take the rotis and stack them on each other as shown in the photo.

Stack

Make a roll out of these, and cut them across the length of the roll as you would cut a carrot or cucumber into discs.

cuttingrotis

Since you are using the rotis will now split into ribbons. This process is called a ribbon cut or a Chiffonade cut. It is normally used to cut green vegetables with big leaves such as spinach. These ribbons will now represent Fettuccini pasta or noodles depending how you space your cuts. I generally space my cuts about 3 mm apart. This is how your ribbons will stack up:

rotiribbons

Now heat the oil in a vessel, and add the vegetables to it. After the tomatoes turn soft, add the roti ribbons, a handful ribbons at a time. Keep tossing to prevent the ribbons from sticking. Once the rotis are well coated with the oil and are getting crispy, add the spices and sauce. Toss well.

Roti Cooked

Toss a little more, and serve.

If you don’t want to use Schezwan sauce, you can substitute that with tomato puree and adding garlics when you first heated the oil. If you want to make the ribbons a little mushy, then add a cup of water when you toss.

rotiready

Mango mini tarts

I was reading the recipe of Chocolate Mini Tarts at Hungry and Excited, and it looked so delicious that I wanted to make them myself. Since mom has a certain dislike for all things chocolatey (rolls eyes), and the oven was tucked away below a pile of other things, I modified her recipe a little to make a no-bake recipe and utilize the fresh batch of Kesar Mangoes that had just arrived.

Here is mine

Ingredients:

  • Mango – 1 medium size
  • Digestive biscuits – 100 gms
  • Unsalted Butter / Ghee – 3 Table spoons
  • Fresh Cream – 100 ml

Process:

Take the digestive biscuits and run them in a food processor or chopper. Alternatively, If you don’t have a processor then wrap the biscuits in a bag and use a rolling pin or another tool to whack them into tiny crumbs. This is what they looked like once I had a go with them in my chopper.

Ground Biscuits

Take the butter (or ghee if you don’t have un-salted butter). Melt the butter, and pour it in the biscuit mixture. Run the processor / chopper once again to ensure that they’re mixed well. If you have used the rolling pin method, then mix the butter and biscuit crumbs well with your hand. This is what they looked like when I made them.

Buttered Biscuits

Take moulds and grease them lightly. I did this by wetting a small piece of cloth with the melted butter and dabbing it around the inner surface of the moulds. Place the biscuit crumbs on the mould and press them hard with your fingers or the back of a spoon. Place them in the freezer for 15 minutes. I don’t have any tart/cupcake moulds with me and use small katoris as moulds instead. This is how they looked just before I put them in the freezer.

Moulded

Blend the cream and mango together till you get a uniform thick consistency. Pour this mixture on the moulds with the help of a spoon. Try and cover the entirety of them with the mango-cream blend. Place them in the freezer for 2 hours. I was able to scavenge for 1 heart shaped mould from mom’s supplies. This is how mine looked before freezing.

Mango poured

After removing them from the freezer, just a small pinch on the outside of the moulds will release the tarts. Keep them in the fridge for another hour. You can now happily enjoy them as they are.

Frozen

Alternatively you can garnish them with what you like. Typically, you can use cut up fresh fruits and dry fruits. Since I had prunes with me, I used them. This is the final result.

with prunes

If you do give them a try, please let me know how they turn out to be. Enjoy 😀

Recipe – Soupy Pasta

Ingredients:

  • Spaghetti  (use wheat or semolina pasta) – 100 gms
  • Onion – 1 medium size – finely chopped
  • Corn Kernels – 1 cup
  • Peas – 1 cup
  • Tomato Puree – 1 cup or 1 medium tomato finely chopped
  • Mushrooms – 3 medium sized, thinly sliced
  • Fortune Rice Bran Oil – 6 table spoons
  • Garlic – 1 teaspoon paste or three cloves finely chopped
  • Red Chilli Flakes – 1 table spoon
  • Hing (Asafoetida) – 1 teas spoon
  • Red Chilli sauce – 2 table spoon
  • Salt – to taste
  • Water

Recipe:

Section 1 – Pasta:

Take 1 litre of water in a wide bottomed or deep vessel.

Add 1 table spoon of salt. Bring the water to boil.

Once the water is boiling add the pasta in it. (Tip: Do not add oil to the water or the vessel. It will prevent the spices and sauces from sticking to the pasta and will reduce taste.)

Let the pasta boil for 10 minutes, stirring every three minutes.

Strain the pasta in a strainer. You can choose to drain away this starchy water or save it to be used as stock in other recipes.

Now transfer the pasta in a bowl. Fill it with cold water, and drain the pasta in a strainer. Repeat till pasta is cold. This way the pasta will not stick together.

Now transfer pasta in an empty bowl. The pasta should not be more than half the bowl’s volume.

We will use this empty space later.

 Image

Section 2 – The vegetables and spices:

Heat 3 table spoons of Fortune Rice Bran oil in a pan.

Add the finely chopped onion and garlic. Sauté till onion turns golden brown.

Add the thinly sliced mushrooms. Add 2 table spoons of oil. Sauté till mushrooms change turn slightly brown.

Add the tomato puree, and stir.

 Add Chilli sauce, chilli flakes, hing and salt. Continue to stir.

Add the Corn kernels and peas.

Stir for 1 minute.

Section 3 – The Soup:Image

Add 600 ml of water.

Stir well and bring to boil.

This will form the soup. Let it boil for 5 minutes by when the corn and peas should soften.

 Image

Pour this soup over the pasta kept in the bowl.Voila, you’re done. You can choose to garnish with sprigs of basil or coriander. But I like to have it as it is.

Image

Now some of you may wonder that this looks like soupy noodles. Yes it looks like soupy noodles because I chose to use Wheat Spaghetti instead of noodles which are made from Maida (or refined white flour.) You can replace the spaghetti with penne, fusilli or any other pasta as well. You’re also using Fortune Rice Bran oil, so that adds to the healthy quotient as well.

Please do tell me how it turned out for you.